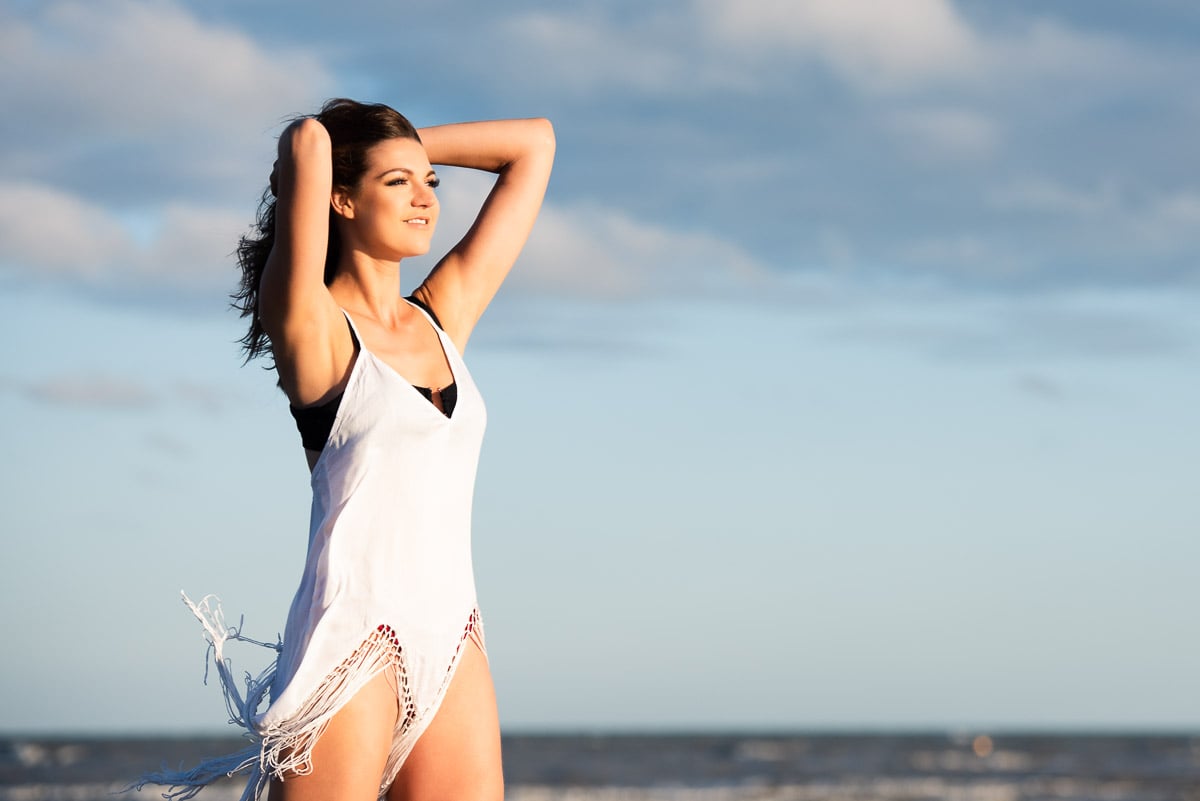
To understand what are highlights in photography, we must first understand that most photos are made up of highlights, midtones and shadows. This is the tonal range of an image.
I say most, because some photos are intentionally very dark (dark and moody photography) and some are intentionally very light (light and airy photography). With both styles of photography there isn’t the usual distribution of shadows, midtones and highlights.
What are highlights in photography?
The highlight areas are the lightest areas of an image, which are the brightest parts of a scene.
In high contrast scenes with a bright light source, such as a sunny day, it can be difficult to retain detail in bright highlights. This is because the shadows are very dark and the highlights are very light and digital camera sensors struggle to record the entire dynamic range of the scene.
Cameras can’t handle the same tonal range of high contrast scenes as our eyes.

What are blown highlights in photography?
When the highlight areas of an image are overexposed and appear pure white, we say the highlights are blown out, or burnt out. This is also known as highlight clipping.
One of the main reasons to photograph in RAW format rather than JPEG format is that RAW files retain much more detail than JPEG files. So, when editing images you’re often able to regain some of the lost highlight detail.
The Lightroom tools that’ll help to reduce bright areas are:
- Highlights slider (best option)
- Whites slider
- Exposure slider
Start with the highlights slider, because this will affect only the brightest parts of your photo. The exposure slider will make a global adjustment to all tones in an image, so you might then need to increase the shadows slider to lighten the dark areas to bring detail back.

Where are highlights in the histogram?
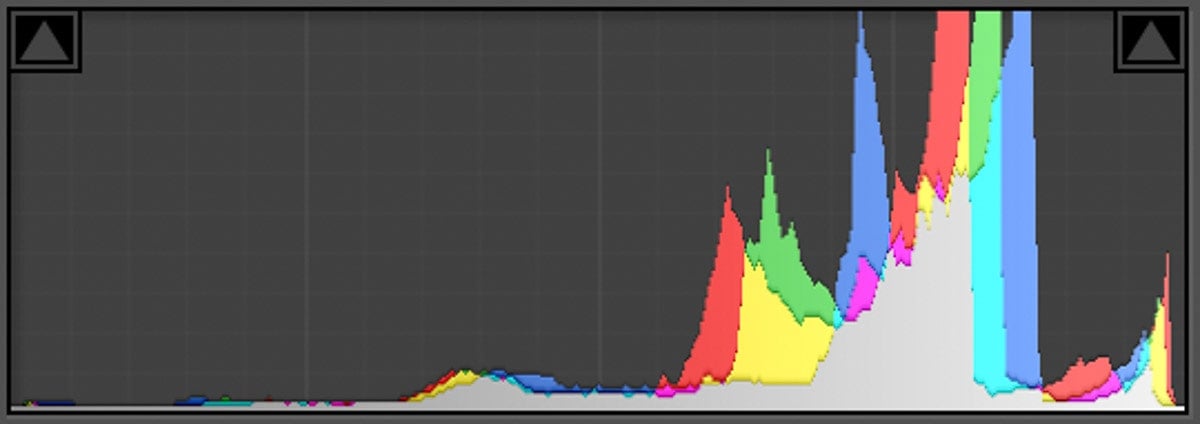
The highlights area of a both your camera histogram and the Lightroom histogram is on the right.
How to tell if highlights are overexposed
If you’re ever in doubt about your highlights during a shoot or in post precessing you have two options:
1. Check histogram for overexposed highlights
When the data on your histogram pushes up against the right side of the histogram, you’ve overexposed the highlights. If you’re lucky, in other words you haven’t completely blown out the highlights, you can darken these areas in post production for a more balanced image.
2. Check highlight warning for overexposed highlights
Digital cameras have a highlight warning setting, affectionately known as blinkies. Because that’s what they do. When you view the images on your camera’s LCD in highlight warning mode the overexposed highlight areas will flash black.
Bear in mind that when you view any information on the back of the camera it’s based on a JPEG preview of the image, even in you’re photographing in RAW, so the information isn’t 100% accurate. That said, it’s really helpful.

Highlight warnings in post processing
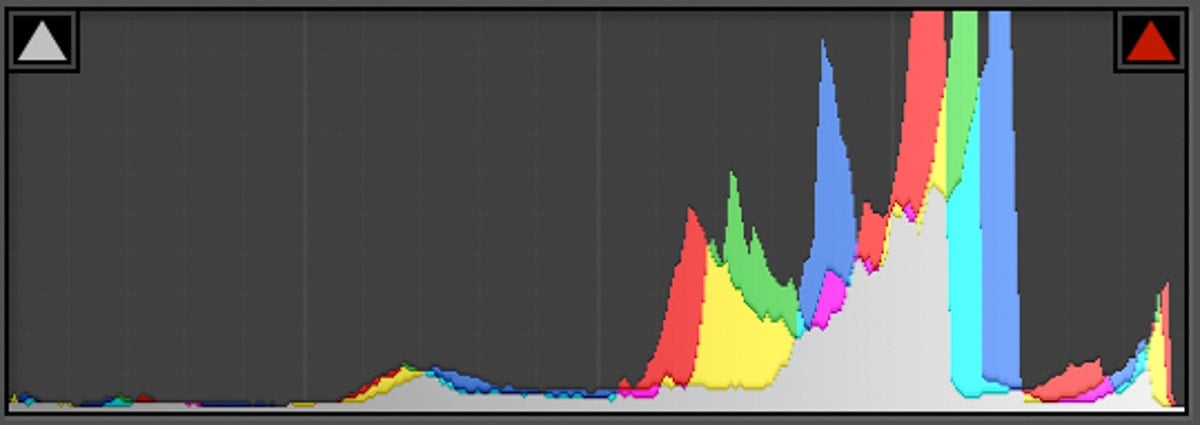
In post production you can also view the histogram and switch on highlight warnings. In Lightroom you can switch on both highlight clipping and shadow clipping warnings in the Develop module by pressing J on the keyboard:
- Clipped highlights show as red in the image
- Clipped shadows will be blue in the image
As you adjust the sliders to darken the brightest points you’ll see the clipping reduce.

How to expose for highlights in photos
Many photographers struggle to get shadow detail while also retaining detail in the highlights, because of the limited dynamic range of digital cameras.
You have three options for retaining highlight detail in high contrast scenes:
- Expose for the highlights and let the shadows go to black
- Expose for the highlights and add fill light to the shadows
- Use exposure bracketing to create an HDR image in post production
Of course, you don’t have to retain the detail if you don’t want to. Even though it’s considered a “correct exposure” when detail is retained in all areas of an image. It’s personal choice.
In my boudoir photography in particular I often intentionally blow out the highlights of a window included in the image to exclude detail outside. However, I’d never intentionally blow out the highlights on my subject.

1. Capture detail in highlights only
If the highlights of a scene are what you want to expose correctly, your exposure settings must be set for this part of the image. So you need to meter this area to get an exposure reading for setting camera settings.
This applies to high contrast images, aka low key lighting. To achieve the look in low key portrait photography or for a black background portrait, expose for the highlights and photograph from the shadow side of the subject.
I find this is easier to photograph in manual mode, but you could also use either aperture priority or shutter priority combined with exposure compensation.
How to meter for the highlights
The most important thing, if using your camera’s light meter to meter for the highlights, is to use spot metering to measure the light on the area you want correctly exposed.
If you use matrix metering (aka evaluative metering) or center-weighted metering you’d need to also use exposure compensation to ensure the highlight areas of a photo are correctly exposed. How much exposure compensation you set depends on the dynamic range of the scene.
Remember that your camera’s light meter measures reflected light. So the color of the area you meter will affect the reading, because your camera wants to make everything medium gray. You might need to use exposure compensation to correct it.
If using a handheld light meter, then you simply need to measure the light falling on the subject.

2. Expose for highlights and add fill light
To retain details in the highlights you need to expose for the highlights and then add light into the shadows to also capture details in shadows. In other words you need to add some sort of fill light.
You can do this by using:
- A reflector to bounce light into the shadow areas
- Or use off camera flash to fill in the shadows
The images below demonstrate the difference these two methods of using fill light can make to the darker areas of an image.

3. Exposure bracketing
Exposure bracketing in photography is used more in nature photography than in portrait photography, because it relies on the subject not moving to create an HDR image.
A brief explanation is that you capture a series of images, normally three, at different exposure settings. The process is:
- First you underexpose the image to capture the highlights
- Then expose correctly for the midtones
- The third frame you overexpose to capture detail in the shadows
- In post production combine the three different exposures into a single photo

What are specular highlights in photography?
Specular highlights are a certain type of highlight in an image. I’ll mention two that you’ll have seen many times before:
- Bokeh
- Hot spots on skin
1. Bokeh
The most common type of specular highlight that we’ve all seen, and many portrait photographers love, is known as bokeh.
Bokeh does not just mean a blurry background – this is a common misunderstanding. Bokeh is the out of focus specular highlights in an image, either in the background or the foreground. In other words the out of focus bright spots, which could be:
- Backlit water droplets
- Fairy lights
- City lights in the distance
- Reflections on vegetation
PS: You can create fun bokeh shapes using a DIY bokeh filter that you can make in minutes – just follow the link to my step by step tips.
2. Hot spots on skin
The other type of specular highlight is also referred to as a hot spot. They’re a reflection of the light used to light the subject and in portrait photography appear as a bright area on a subject’s skin.
- In studio photography specular highlights are caused by the brightest part of the strobe
- With natural light photography specular highlights are a reflection of the sun
The likelihood of hot spots increases when small point-sources of light are used and also when subject’s face is particularly shiny. A relatively large light source emits soft light so is less likely to produce hot spots than hard lights.
Last point on highlights in photography
Many photographers choose to underexpose their images when photographing scenes with a high dynamic range. They then increase the highlights and light areas of the underexposed image when editing in Lightroom, or similar editing programs.
The risk with doing this is that you can lose detail in the shadows or introduce noise to the shadows by underexposing and then brightening them in post.
However, as with everything, overexposure and underexposure in photography comes down to personal preference and photography style.
Leave a comment
If you have any questions about what are highlights in photography, let us know in the comments.
Also, I love good news, so if my photography exposure tips have helped you to control the brightest parts of a photo, share that too.


Wondeful tips to deal with highlights in photography.
Great post! I love how you explained the importance of highlights in photography and provided tips on retaining detail. The suggestions on using exposure bracketing and post-processing techniques are particularly helpful. I can’t wait to try them out in my own work!
Very informative article for a novice like myself. Thank you for excellent writing and for sharing your experience!