I’ve always been a keyboard shortcuts fan, ever since I first learned Word. Why take longer to look for the function you want, move and then click with a mouse, when pressing a key is so much faster? So when I started using Lightroom I immediately hunted down the Lightroom shortcuts.
Over the years, as Lightroom evolved into the powerful version of Lightroom Classic that we now have, the list of keyboard shortcuts (also called hotkeys) has got longer.
I don’t know every single key on the Lightroom keyboard off the top of my head, but the functions that I use all the time have become second nature.
You’ll find the 28 Lightroom shortcuts listed below a massive time saver and they’ll soon become second nature to you too, because you’ll use them every time you use Lightroom Classic!
Also, if you’re a professional portrait photographer doing in person sales with Lightroom, some of these Lightroom shortcuts will make for a much slicker viewing session. If you can improve the client experience, you’ll also increase your average sale.

Now let’s speed up your Lightroom workflow! I’ve grouped the shortcuts into:
- 6 Lightroom shortcuts for navigating modules
- 6 Keyboard shortcuts for selecting photos
- 11 Lightroom shortcuts for editing
- 5 Lightroom hotkeys for changing views
You’re going to love the humdinger of a helpful Lightroom shortcut I’ve listed at the end! (Saving the best for last!)
One more thing – I’ve written the Lightroom keyboard shortcuts as capital letters, but it makes no difference, so you can also just type the small letter to activate the hotkey.
6 Lightroom shortcuts for navigating

Develop module in Lightroom Classic.
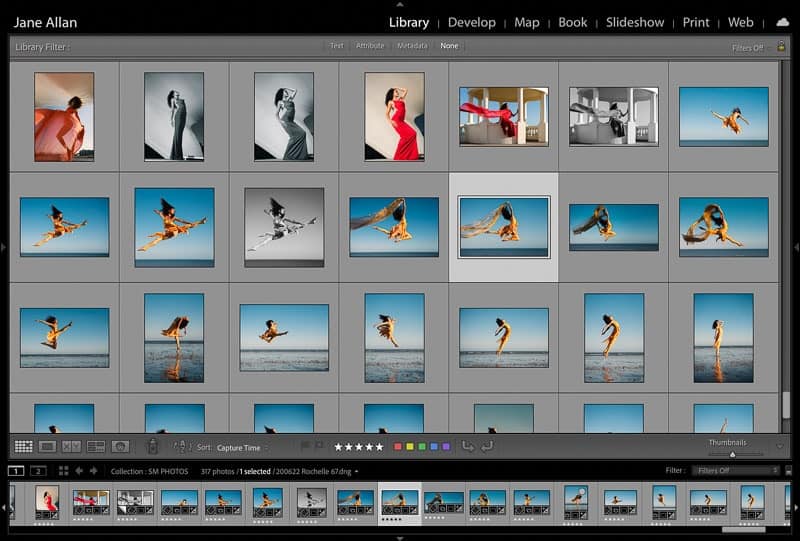
E: Loupe view of the Library Module
The Loupe view is the single image view in Lightroom’s Library module, so handy for viewing one photo at a time.
G: Grid view of the Library Module
Grid view is a great way to:
- Quickly find a particular photo from a shoot
- Get a feel for the variety of your shoot or selection of images
- Scroll through the images in a folder or collection
I constantly move between loupe view and grid view during image selection, editing and client viewing sessions. Without these two shortcut keys I’d be a lot slower.
D: Develop Module
A quick way to get to the Develop module from any module in Lightroom is to press D on the keyboard.

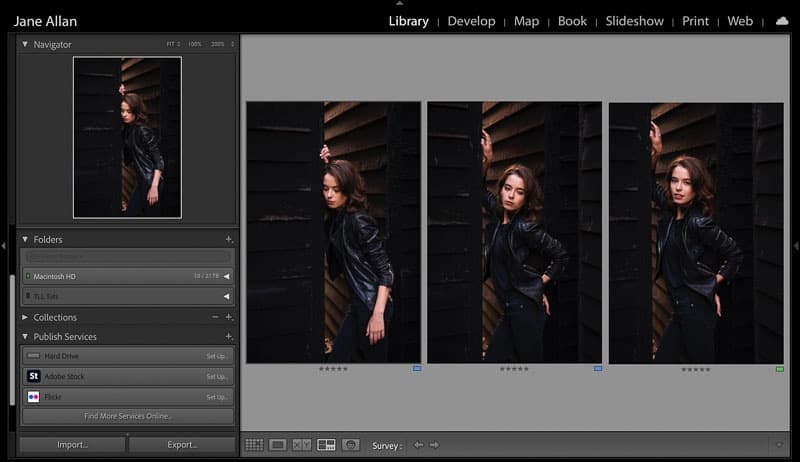
Using survey view in the Library module to decide between 3 similar images. You can also see the star ratings and color ratings below each photo.
N: Survey view in Library Module or Develop Module
I love survey mode, but there are only two times I use it:
- When selecting my keepers from a range of similar photos it helps to see them all at once to be able to see my favorite/s easily. It speeds up what can be the most arduous element of a shoot – selecting keepers!
- During in person sales sessions with portrait clients when a client can’t decide between two or more photos. In this situation it’s really helpful to be able to show a small range of images together.
Click N to show your selected photos in survey mode and then E or G to go back to the normal Library module or D to go back to the normal Develop module view.
CTRL P: Print Module
Just like when using Word, Excel, PowerPoint or any of the Mac office programs, clicking CTRL P (or CMD P on a Mac) activates the print menu.
In Lightroom the CTRL P shortcut key opens up the Print module. I use this module a lot for:
- Multi aperture client prints and
- When I create multi-aperture digital images in these tutorials
A multi-aperture print or digital image contains two or more images together in one frame (print) or image (digital).
6 keyboard shortcuts for selecting photos
Culling photos can be a long and tedious process and one of the best ways to speed up the process is to use these Lightroom culling shortcuts.
P: Pick or flag an image
I don’t use this, or the next shortcut key, to select images, but I know it’s a popular feature in other photographer’s Lightroom workflow. I prefer to use star ratings – more on that in a moment.
As it’s a popular method, I’ve included it in my list of most used Lightroom shortcut keys.
The worst part of a shoot for most photographers is the selection process afterwards. So anything that can speed up selecting keepers to edit or make it easier is a good thing.
When you press the P key in any module it picks the image, which you can see by the little white flag in the top left of the image in the film strip.
To undo / deselect / unflag it press U.
X: Reject photos
Like the P shortcut key, X is used when sorting through images from a shoot. To mark an image as a reject to be deleted, press X.
The action doesn’t delete the photo from Lightroom, just stores it as a reject. You can delete all rejects once you’ve been through the images and decided on which to keep and which you don’t want.
Again, I prefer to use a star rating system, but the reject method is also popular.
Like with picking images, pressing U (for unflag) will reverse the rejection.
B: Add to quick collection or target collection
I use quick collections and target collections a lot, especially when I’m collating photos from different folders (I use a new folder for each shoot).
A really easy way to add to a these collections is, with the photo selected, simply by pressing the B key.
Press B to also remove a photo from a collection.

Grid view in Library mode – you can see the star ratings of the photos in the film strip.
0 – 5: Star rating photos from 0 to 5
Star rating images in Lightroom is a great way to quickly see which are your favorites. As I’ve already mentioned it’s also a great way to work through a shoot selecting your keepers.
With my system keepers get 3 stars and anything below that is deleted.
Star rating is also really effective with in person sales for portrait photography to help a client decide on the images they would like.
It’s pretty self explanatory – the numbers on the keyboard from 0 to 5 represent the number of stars you’ve assigned to a photo. Press the number 5 for a 5 start rating. To remove the star rating simply press 0.
6 – 9: Color rating photos
Color rating photos in Lightroom is also a great way to select images from a shoot. Once done you can sort your images by color rating, so you can easily gather them together.
Each number from 6 to 9 represents a color and to apply color rating to a photo press the color’s number:
6 = red
7 = yellow
8 = green
9 = blue
And then there’s also purple, but I guess they ran out of keys, because there isn’t a shortcut key for purple.
You don’t have to remember what color each number represents, because the numbers are in the same order as the key you can see in the Lightroom toolbar.
To undo it press the number again. So to “unred” a red image simply press 6 again.
CAPS LOCK: Automatically move to the next image
This is a great workflow shortcut that’s especially useful when rating and selecting images.
Lightroom automatically moves on to the next image when CAPS LOCK is activated once you’ve:
- Star rated
- Color rated
- Picked
- Rejected
- Added or removed an image from a quick collection
When working through a large number of images every time you can save yourself a press of a key, you save time, which speeds up your Lightroom workflow.
11 Lightroom keyboard shortcuts for editing
I save so much time in Lightroom editing with these hotkeys! Anything that speeds up my photo editing workflow is a huge win in my books. See these edits at work in this article I wrote with before and after edited photos.
Q: Spot removal tool / Healing tool / Clone tool
Open the healing tool (used to be called spot removal) in the Develop module from any Lightroom module to remove objects, spots marks on background, creases in clothing.
You’d be amazed how much you can remove with Lightroom’s healing tool, especially with the addition of AI content aware healing tool.
Press Q again to close the tool.
M: Linear Gradient
Open the linear gradient masking tool (used to be graduated filter tool) in the Develop module from any Lightroom module.
Press M again to close the tool.
SHIFT M: Radial Gradient
Open the radial gradient masking tool (used to be radial filter tool) in the Develop module from any Lightroom module.
Press Shift M again to close the tool.

The local adjustment brush is selected with a wide feather amount.
K: Brush tool
Press K to open the brush tool in the mask panel (used to be the local adjustment brush tool) in the Develop module from any Lightroom module.
Press K again to close the tool.
PS – for an even speedier workflow, save yourself time by creating custom presets with Lightroom brushes.
[ or ]: Decrease and Increase brush size
The left square bracket [ decreases the brush size and the right square bracket ] increases the brush size.
Obviously, you must first select the brush tool before adjusting its size.
SHIFT [ or ]: Adjust the feather amount of the brush tool
Following on from the above, when you hold down shift and either [ or ], you decrease or increase the feather amount of the brush.
Again, first select the brush tool before adjusting the feathering.
O: Hide or show mask overlay
A Lightroom mask overlay is an easy way to see where your mask is on the image you’re editing.
To show the mask you created press O on the keyboard. The mask will have a red overlay by default. Click O again to hide the mask.

You can see the edit pins of the spot removal tool.
H: Hide or show tool edit pins
This shortcut key was such a welcome discovery to use when editing in Lightroom with:
- Spot removal
- Masks
For two reasons:
- If you’re trying to brush over an area and accidentally brush over the edit pin, you can unintentionally change your settings without realising it
- If you’re working on a small area and the edit pin is covering part of the area you’re working on it’s really annoying
So I use this tool a lot a lot a lot to toggle the edit pins on and off.
Quick warning about hiding edit pins
Now that you know about it, remember it when you revisit a photo that you’ve already edited and click on any of the adjustment brushes. If you’ve hidden the edit pins, they won’t show when you click on the tool if you’ve hidden them.
Easily resolved – just click H and you’ll see the edit pins again.
Alternatively, to avoid that confusion, you can always just press and hold H down to hide it temporarily. When you release the key the edit pin will be visible again.
This can be particularly handy to use while working on the area with the adjustment brush. If you can tap your head and rub your stomach at the same time. I prefer to just switch on and off.
R: Crop tool
I use the crop tool shortcut a lot! Not just to crop photos either.
The quickest way to straighten a photo is to give it a quick tweak in the crop tool and the quickest way to get to the crop tool from any module in Lightroom is to push the R key on the Lightroom keyboard.
As with the other shortcut keys, pressing R also closes the crop tool.
Now here’s a little magic bonus shortcut key…
With the crop tool open press X to change the orientation of your crop from portrait to landscape or vice versa. Easy!
So, for example, if your image is in portrait orientation:
- Push R to open the crop tool
- Push X to crop to a landscape orientation
- Then adjust to how you would like it
- Push R to close the crop tool
If you’ve pushed X to change the orientation, you can change it back by hitting X again.
It’s really quick and versatile and can be used at any point during cropping.
Warning – don’t get your X’s mixed up
Just remember that if you don’t have the crop tool open already and you press X in any of the modules, you’ll end up “rejecting” the photo, because X is the Lightroom shortcut key for “reject”.
Except for when the crop tool is open.
It’s a mistake that’s easily fixed, but kinda defeats the object of a shortcut key, because then you have to take the time to undo the unwanted “rejection”.

V: Toggle between black and white and color
I love this hotkey! For starters, you can use it in either the Develop module or the Library module, even in grid view.
Some photos really suit a black and white conversion and the V shortcut key is the quickest way to find out.
It’s a great shortcut to use during in person sales sessions if a client is wondering if a photo would look better in black and white or color. With one click of a button you can give them a quick and basic idea of what the image would look like.
But it’s not as basic as simply desaturating a color image to get a black and white image.
Lightroom actually makes a few adjustments to the color balance so that the first impression of your color image in black and white is a great starting point for converting an image to black and white.
To switch back to color, press V again.

The only difference is that I pushed V to change it from color version to black and white – notice the black and white mix color slider changes that Lightroom automatically made.
W: White balance
While white balance isn’t something you adjust constantly when processing a shoot, using the white balance shortcut key is convenient. And anything that cuts down on keystrokes or mouse movement improves your photo editing workflow, so I’ve included it.
You can press W from any Lightroom module to open up the Develop module and white balance tool in one quick move.
Press W again to close the white balance panel.
5 Lightroom hotkeys for changing screen views

Screenshot of a side by side before and after editing view achieved by pressing the Y Lightroom hotkey.
\: Before after views in Develop module
I like to think of the before and after view shortcut key as a sanity checker.
You know how sometimes you’ll be editing away thinking you’re doing something great. Then you step away to make a coffee or something and you come back, take a look at your screen and wonder what planet you were on?
That’s because over time your eyes adjust to the colors on your screen.
So it’s really helpful every now and then to check on the before image to make sure you haven’t gone too far in your Lightroom color grading or skin smoothing or whatever.
Word of warning about \
This works in the Develop module only. If you’re in the Library module and push \ the filter toolbar shows. While this is useful, it’s not as big a deal as the before and after shortcut of \ in the Develop module.
Mixing up / and \
Also, even after all these years I still get the / mixed up with the \.
Pushing / deselects a photo, so no train smash, but a bit confusing when you do it expecting to see a before or after image and all of a sudden all you see is a gray space.
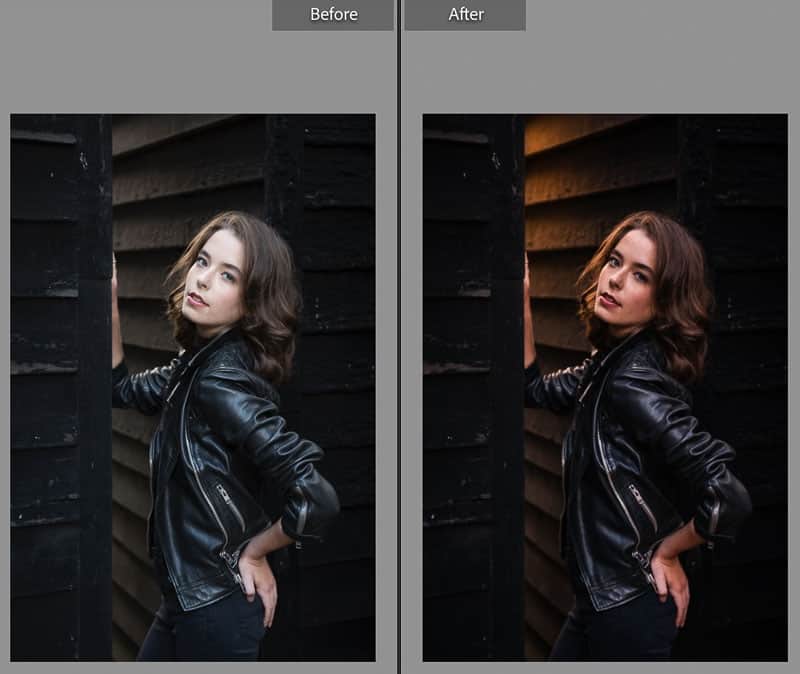
Y: Side by side before and after view
Speaking of Lightroom before and after shortcuts, here’s proof that it’s a big part of a sane workflow…
Lightroom has another shortcut key for before and after views. The Y key creates a side by side before and after view of your image.
The before image is on the left and the after image on the right. Also really handy.
As with most shortcuts, press the same hotkey again, in this case Y, to close it.

TAB: Switch the left and right panels off an on
Sometimes you need an image to fill more of the screen, such as:
- To view the image on an uncluttered screen
- When using a small screen, such as a laptop
- Using Lightroom for in person sales sessions (they don’t need to see your folder structure or metadata)
Bonus shortcut tip
Hold down SHIFT and click TAB to hide or show all 4 panels (left, right, top and bottom) to give your image maximum screen space without going to full screen mode.

F: Toggle between full screen and normal mode
Speaking of full screen mode. Sometimes you want to see your photo in all its glory, taking up the full screen. During in person sales, it’s a great way to give the full impact of an image to clients, especially if you’ve hooked your computer up to a nice big TV.
Click F for full screen and then push it again to toggle back to your usual view.
SPACEBAR: Zoom in an out
If you’re anything like me (a pixel peeper) you’ll love this shortcut key for the quick ability to zoom in and out to check on focus. When selecting photos, no matter how good a shot is, if the eyelashes aren’t sharp I’m just not comfortable keeping the image. I know, I annoy myself too.
So, when you press the spacebar Lightroom zooms in to whatever level you zoomed into last. For me that’s usually 100%.
Press the spacebar again and you’ll zoom back out to normal view.
F: Toggle between full screen and normal screen
For a completely uncluttered view of an image view it full screen simply by pressing F on the keyboard.
To go back to normal view press F again.

4 bonus Lightroom shortcuts that are incredibly useful
CTRL or CMD A: select all photos
The fastest and easiest way to select all photos in a folder or collection is with the select all keyboard shortcut.
And there’s also a Lightroom shortcut to deselect them, just press CTRL or CMD D.
CTRL or CMD ‘: duplicate a photo
This has to be one of my favourite reasons for using Lightroom Classic!
To create duplicate photos, known as virtual copies in Lightroom, all you need to do is press CTRL ‘ (on a pc) or CMD ‘ (on a Mac) and a duplicate image will appear alongside the original photo. You can then experiment with a different edit without affecting the original photo.
Plus, virtual copies don’t take up extra room on your computer, because the actual photo isn’t duplicated – it’s a virtual copy. If that sounds confusing, check out the full article on virtual copies in the link above.
CTRL or CMD Z: undo
I sometimes wish I had this Lightroom hotkey in real life situations!
Like with all programs CTRL Z (on a pc) or CMD Z (on a Mac) will undo your last action.
It’s the shortcut key we cannot live without and is the same in all programs – undo! I use it a lot!
CTRL or CMD ?: shortcut key list
This is your helpful hotkey humdinger I mentioned in the beginning.
To get a list of all the Lightroom shortcut keys available to you for the Lightroom module you’re in, just press CTRL ? if you use a PC or CMD ? if you use a Mac.
To hide the list of hotkeys, just click with your mouse anywhere on the list.
I saved this one until last, because it’s a bit overwhelming to be confronted with all the Lightroom hotkeys at once.
Hopefully by now you’ve got a good idea of the shortcut keys you’ll use all the time, so won’t be too intimidated by the full spectrum of the Lightroom keyboard.
Leave a comment
If you have any questions about Lightroom keyboard shortcuts, let us know in the comments.
Also, I love good news, so if these Lightroom shortcuts help you speed up your workflow, share that too.


Very beneficial and no doubt a big time saver!
You are top!
Thank you for your lovely comment!