Adobe Lightroom has different modules for different stages of your workflow. “Module” is just Adobe’s terminology for these stages and really helps to separate them. You might not use every module, but you most certainly will use the Lightroom library module. It’s the heart of your Lightroom catalog photo organization.
You’ll also use the Develop module all the time for processing images, but that’s for another article.
The 7 Lightroom modules are:
- Library
- Develop
- Map
- Book
- Slideshow
- Web
I’ve never needed to use the Map or Web modules and I hardly ever use the Lightroom Book module, although it’s really good for printing a photo book to Blurb books or a pdf of a book design to load to another supplier. The others I use all the time.
In each of the modules the center area of the screen is where your image is displayed, and the tools are located top, bottom, left and right of this. This area can be configured differently, depending on the view mode you select.
Library Module view modes
View modes are simply a way of displaying your images on the screen to suit different tasks, such as photo selection.
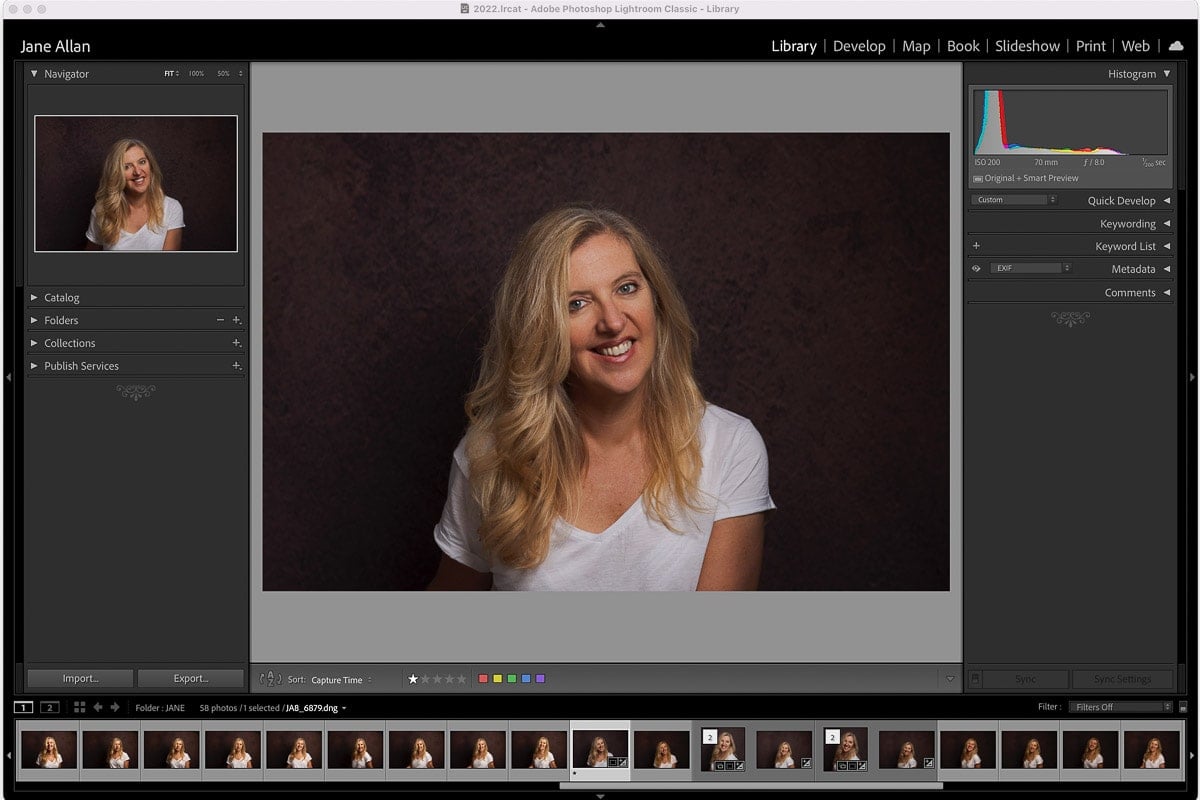
1. Loupe view (E keyboard shortcut)
Loupe view displays one photo at a time in the middle panel – the photo that you’re working on.
To change the photo displayed in loupe view either click on another photo in the filmstrip, or use the arrow keys to move to the before or next photo.
In this view you can also zoom in close on an image to really see the details. It’s handy for checking on how sharp the focus is (if you’re a pixel peeper like me) when culling photos from a photoshoot.
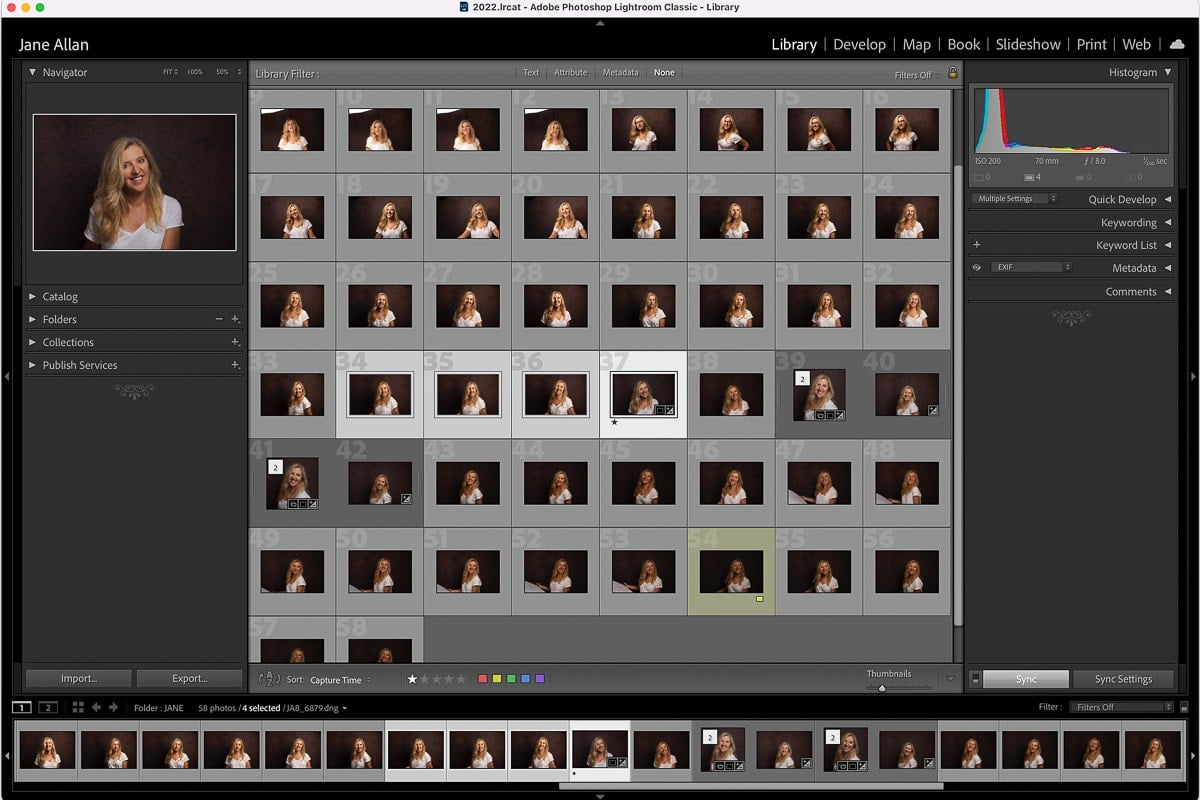
2. Grid view (G keyboard shortcut)
Loupe and Grid views are the two Lightroom view modes I use the most.

When I want to see a lot of images at a glance or to scroll through the images in either a folder or a collection, I use grid view. It gives you a great overview of all the photos. Plus you can adjust the size of the thumbnail images so that you can see more at a glance or less.
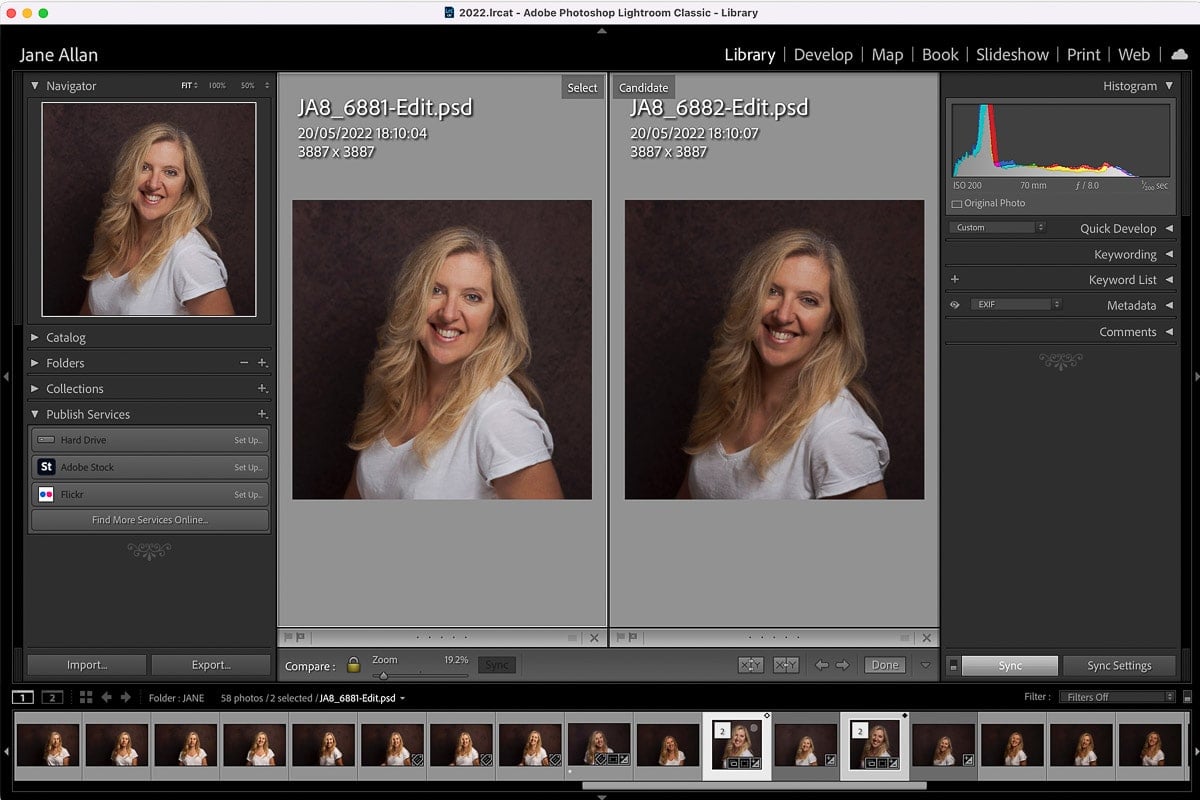
3. Compare view (C keyboard shortcut)
Compare view displays two photos in the middle panel – the “candidate” photo on the right and a photo you “select” on the left. Once you’ve displayed the candidate photo you can click on another photos and it’ll be displayed on the select side. When you click on another image in the filmstrip it will be swapped with the photo on the select side.
I don’t ever use this view, but I can see how it would be useful if you want to compare a particular photo with various other photos. I prefer to use survey view.
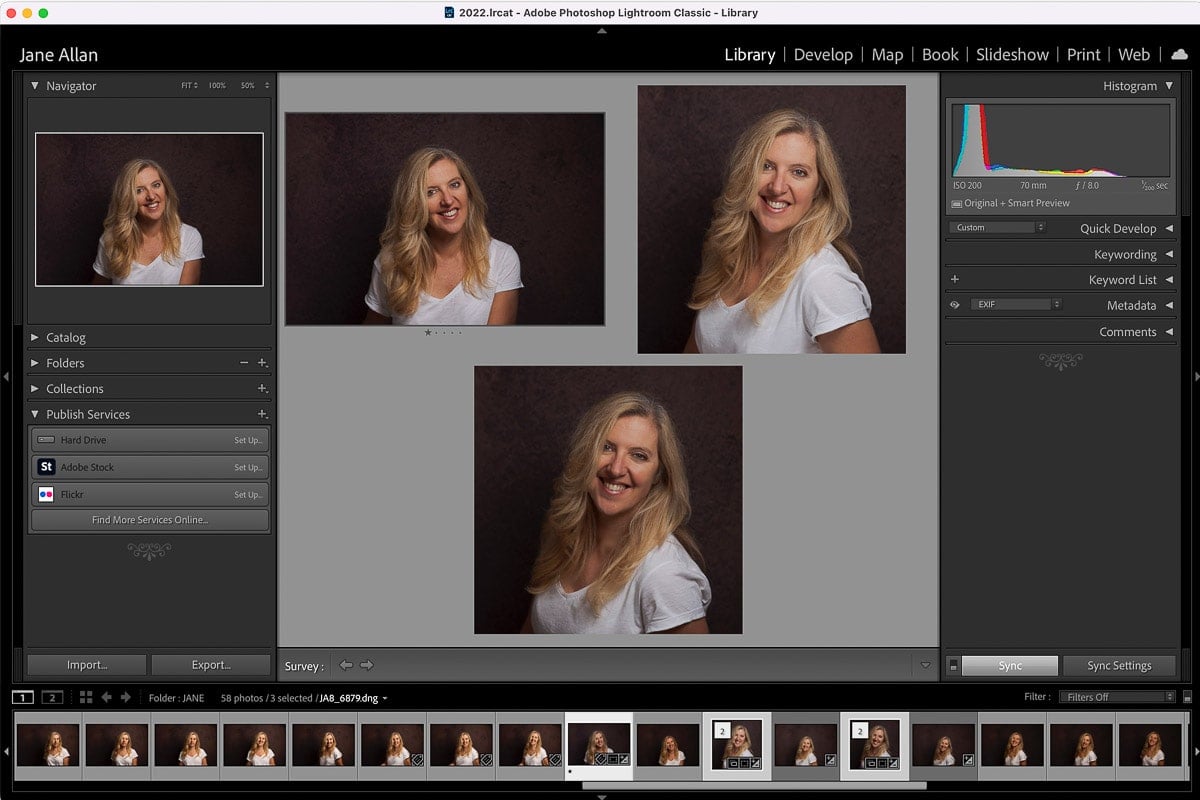
3. Survey view (N keyboard shortcut)
I use survey view a lot when culling photos when I’m trying to decide on the best image in a series of similar images. I also use it a lot during in person sales sessions as it really helps the client to decide on their favorite images.
Survey view allows you to select a number of images to display in a grid. So it’s like a mixture between compare view and grid view.
5. People view (O keyboard shortcut)
Even though I’m a portrait photographer, I don’t use people view as I don’t need to find a particular person photographed several times over years. It might be handy for photographing your own family and friends.
Handily, Lightroom fully explains this view as soon as you either click on the people view button in the toolbar, or push O on the keyboard in the Lightroom Library module.
Tour of Lightroom Classic Library module layout
All the Lightroom modules are laid out in a very logical way and the library module is no exception. Generally speaking your workflow will be from left to right of screen and top to bottom.
In a moment I’ll break down how to use each toolset in the library module, but first, here’s a quick overview of the layout.

1. Top panel
The top panel displays the module picker for navigating around Lightroom from one stage of your workflow to the next by clicking on the relevant tab (aka module). It remains the same, regardless of which module you’re in.
So, for example, if you’re in the Develop module processing photos and want to go back to the Library module, you can simply click on the Library tab. Or if you want to really speed up your workflow, use the keyboard shortcut by pushing E.
I’ve included a list of essential keyboard shortcuts for a fast workflow in the Library module at the end of this article.

2. Left panel
The left panel in the Lightroom library module is for:
- Organizing photos, like you would in an actual library
- Navigating around the active photo (the one you have open)
- Sending photos to various publishing services or your hard drive (this is an alternative to exporting)

3. Right panel
Lightroom’s right panel is for entering and viewing information of the active photo. This is where you can:
- Enter keywords to make finding a photo easy
- View the data on your photo, including the histogram and metadata
- Add comments to photos
You can also do a basic edit on your photo, but I’ll get into this in a moment when we go into the right panel in detail.

4. Tool Bar (T keyboard shortcut)
The toolbar is the gray bar below your central photo, or grid of photos, and remains the same regardless of which Library view mode you’re using (more on view modes in a moment).
If you don’t see it, it could be hidden. In which case either :
- Use the shortcut key to display it by clicking T on your keyboard or
- Click on View in the menu at the top of the screen and then deselect “Hide Toolbar”
![]()
The toolbar has the potential to contain buttons for a total of 10 functions, but you can modify it to suit your needs for a cleaner interface. Some functions have several buttons. I’d recommend having only the functions you use so that you don’t get overwhelmed.
Many of the buttons also have a keyboard shortcut, so if you know your shortcuts, you won’t need to use the buttons.
The size of your screen dictates how many functions you can access in the toolbar. So if you have a small screen and all the functions selected for the toolbar, they won’t fit. I could display all the functions on my 27″ iMac, but not on my 15″ MacBook.
This is really important to remember, otherwise you could get stuck wondering how to turn something on or off.

Toolbar functions include:
- View Modes
- Sorting
- Flagging
- Rating
- Color label
- Rotate
- Navigate
- Slideshow
- Zoom
- Draw Face Region
- Grid Overlay
Grid view also has the option to add:
- Painter
- Thumbnail size
I display only two of three functions in my toolbar:
- Sorting
- Rating
- Thumbnail size
I don’t use Draw Face Region or Grid Overlay and the other functions have keyboard shortcuts, which are much quicker to use.
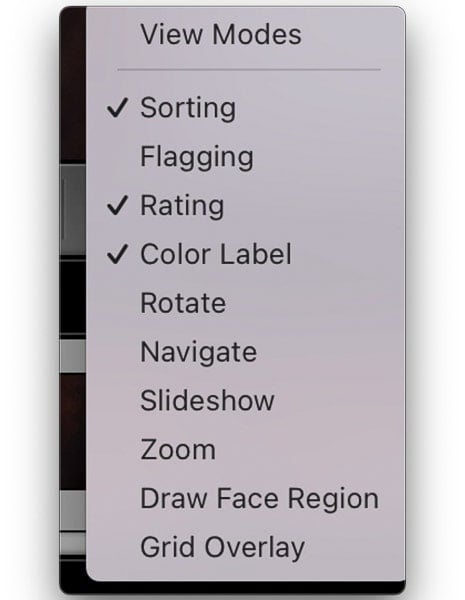
How to set up your toolbar
- Click on the upside down triangle to the right of the toolbar
- A dropdown menu will open up and the items that are ticked are the ones you can see in your toolbar
- Click a function to either select or deselect it

6. Film Strip
The film strip of image thumbnails is below the toolbar and looks like what it says on the tin – a film strip – with a black bar of icons above. All the images in a particular folder or collection are displayed here in one long strip. To display an image or series of images in the center panel click on an image thumbnail or series of images in the film strip.
When multiple photos are selected in the film strip (or grid view for that matter) the area around the image is a lighter color than the other images and the image that you’re working on or selected first, the active photo, is an even lighter color.

Black bar above the images
Between the toolbar and the images is black bar with various icons. Like the toolbar, this can be very busy and make your screen feel cluttered. For this reason I minimize the filter section by clicking on the word “Filter”.
Icons from left to right:
- 2 squares with 1 and 2 – click 1 to view main window only or click on 2 to open a second window (I never use this)
- 4 block grid – changes the view mode to grid view (I’d rather use the shortcut key)
- Arrows – these aren’t for photo navigation, they’re to go forward and back to the view you last used (i.e. grid / loupe / compare / survey) and I see no point in this function. If you want to change the view mode just change it with shortcut keys, rather than going back and forth.
- Folder (or Collection) – displays the address of your photo (i.e. which folder it’s in), how many photos are selected, the image file name and in the case of a virtual copy, the copy number to indicate if you’ve made a second copy or more. If the image you’re working on is in a folder, the text says Collection rather than Folder. Very handy!

- Filter – displays icons to filter images in a folder or collection based on edit status or attributes, such as color rating. It’s an image search tool. Click on the word “Filter” to either hide or open up the options
I only ever look at the address function of this bar so that I can see at a glance how many photos are selected, the photo name and what folder or collection I’m in.

Image thumbnails in the film strip
Icons, which Lightroom calls badges, are displayed on image thumbnails in the film strip when you edit an image. So you can see at a glance if an image has been edited, particularly if it’s:
- Cropped
- Has develop adjustments (i.e. it’s been edited)
- Has GPS coordinates
- Is in a collection
- Is in a quick collection
- a virtual copy of an image
Clicking on these icons won’t do anything, unless you’ve specifically deselected “Ignore click on badges” in your Lightroom preferences. They’re just for information at a glance.
But it doesn’t end there. In the film strip you can also see at a glance images with:
- Star ratings
- Color labels
- Flagged or rejected
These are all great tools for selecting the best images from a shoot. I prefer to use star ratings and color labels and hardly ever use the flag and reject option.

Left panel of the Lightroom Library Module
Remember I said earlier that Lightroom is arranged logically and the workflow is from top to bottom and left to right. So we’re starting at the top of the left panel and working our way down, just as you would when working in Lightroom.
You’ll notice that I refer to the tools in the left and right panels as panels as well. They’re panels within panels, because they each contain several tools relevant to that panel’s function. It’s just a way of grouping tasks, so don’t get stuck on the terminology of what’s a panel and what’s a tool.
All the panels to the left and right of the screen can be opened and closed by clicking on the sideways triangle at the top left of the panel.

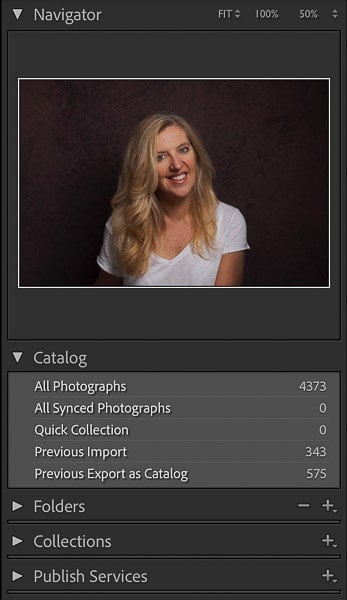
1. Navigator panel
The photo that you’re working on is displayed in the navigator panel, unless you mouse over a photo in the film strip. In which case, the photo under your mouse will be displayed. This is both handy and confusing:
- Handy if you want to quickly see a larger version of an image in the filmstrip
- Confusing if you forget that your mouse is resting on a filmstrip photo instead of on the photo you’re working on

In the top right of this panel you have four options for zooming into and out of the photo you’re working on:
- Fit or Fill or the two triangles to toggle between these two options
- 100% to zoom in into the photo by 100%
- Whatever number is next displayed, e.g. 200% is the last used zoom percentage other than 100%
- Or click the two triangles to select another percentage to zoom into
Whichever option is highlighted in white text is the level to which you’re zoomed in. Click on the image again to either zoom in or out.

If you’re in grid view when you click a zoom depth in the navigator panel you’ll be automatically taken to loupe view as you zoom in.
When zoomed in click and drag on the navigator panel to move around the photo. Or click and drag on the active photo in the central workspace.

2. Catalog panel
The catalog panel is fairly straight forward. You have 4 options for viewing the images in your Lightroom Classic catalog:
- All Photographs – all the photographs in your Lightroom catalog
- All Synced Photographs – all photographs in your catalog that are synced to Lightroom mobile. Drag photos to this collection to sync them with Lightroom mobile, but enable sync first by clicking on the cloud icon at the top right of the screen.
- Quick Collection – all the photos you’ve added to a quick collection from a single folder or different folders. Very handy for gathering together photos along a particular theme that have been shot at different times. I use this a lot when gathering photos for these articles.
- Previous Import – the last photos you imported to Lightroom

3. Folders panel
Lightroom folders reflect the filing structure on your computer. Any changes to this structure, like renaming a folder, creating a new folder, deleting a folder or moving a folder etc must be done in Lightroom itself.
Remember that the (hopefully) RAW files that you see and work on in Lightroom Classic are a preview of the finished files that you’ll export from Lightroom in (probably) JPEG format.

So the folders panel is crucial to your photo organization within Lightroom and on your computer. If photos and/or folders go missing in your Lightroom catalog there’s a very good chance you made a change to a folder on your computer instead of going through Lightroom to do it.
- Click the plus sign at the top of the folder to create a new folder
- Click the small triangle next to the plus sign to set the folder display options. I have “Folder Name Only” selected and “Show Photos in Subfolders”
- Mouse over a folder to see the full address of where it’s stored on your computer
- The numbers to the right of the folders indicate how many photos are in a folder and its subfolders
- Folders with a solid triangle next to the folder name have sub folders. Faded triangles indicate a folder has no subfolders.
- To delete a folder, select the folder and click the minus sign that appears next to the plus sign at the top of the folders panel
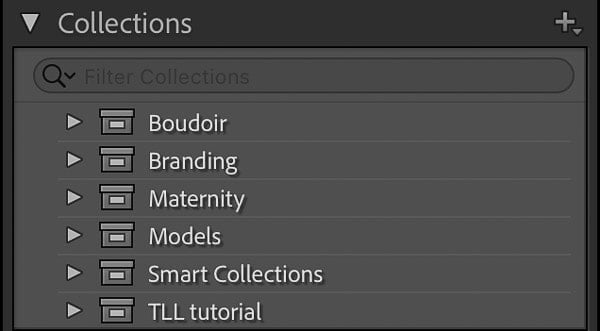
4. Collections panel
While folders are a rigid filing structure, collections are more temporary, like a working folder. There are two types of photo collections in the collections panel:
- Preloaded smart collections created by Lightroom and any you create
- Regular collections created by you
Collections are a big part of my workflow, because you can move photos in and out of collections from different folders, as well as reorder photos within the collection. You can also create collection sets.

Here’s how I use collections in my own workflow for my portrait clients…
- Let’s say I do a photoshoot of The Queen
- After importing the images to a folder that I’d title The Queen, I’d create a collection titled The Queen, add all images from the photoshoot and then cull them to my final selection to present to my client, The Queen.
- After the viewing, which I do using a star rating system in the Lightroom Library module, I’d create a collection set titled The Queen Final.
- Then I’d create a collection titled The Queen album for the album photos and add them to the collection set.
- I’d do the same with a collection for wall prints – The Queen wall.
- Then I’d add a final polish to the images, working in The Queen Final collection set.
- In The Queen album collection I’d select all images and export them using an export preset I created for album prints.
- I’d export all images in The Queen wall collection with an export preset for wall prints.

5. Publish Services panel
Lightroom Classic comes with the following publishing services preloaded. You just need to set them up with your own details using the pop up dialog box.
- Hard drive
- Adobe Stock
- Flickr
There’s also a button to find more services online.
Aside from Adobe Stock I don’t use the publish services panel. I’d rather export images to my hard drive using the export menu than use the hard drive publish service.

6. Import and Export buttons
When you open Lightroom you’re automatically taken to the library module. Once you’ve inserted your memory card into the card reader, if the import screen doesn’t open up you can click the import button to open it manually.
To export photos to your computer for printing or sharing online, click the export button.
For a faster workflow, set up export presets for exporting multiple photos.

Right panel of the Lightroom Library Module
The right panel of the library module is for basic edits and entering keywords so that you can easily find photos in the future, plus viewing and adding metadata to your photos.
1. Histogram panel
The Lightroom histogram is visible in both the library module and the develop module. The difference is that in the library module it’s for information only while in the develop module you can click and drag on it to adjust brightness in different tonal areas.

2. Quick Develop panel
I wouldn’t recommend using the quick develop panel for processing images, but if you’re in a rush to get some basic Lightroom editing done, you could use it. Here’s what you can do:
- Apply a Lightroom preset
- Adjust white balance by selecting Auto and letting Lightroom do it for you or custom and then adjusting to taste by clicking on the sideways triangle on the right.
- Basic tonal adjustments with Tone Control by clicking Auto or open up the full selection by clicking on the sideways arrow.
It’s much faster and easier to use the basic panel of the Develop module.
The only exception is when you want to apply a preset to a selection of photos. Select the images in the library module and, in the quick develop panel, open Saved Presets and select from the menu.

3. Keywording panel
Keywords are a powerful tool for searching a large catalog for images. To make your photo searchable with keywords, enter relevant keywords, separated by commas, into the box.
I don’t use keywording in my business workflow, because each shoot is saved in its own folder based on genre and then client subfolder. For personal photos, particularly travel photos, they’re handy, because I add the year and location into the keywords.
Lightroom also offers Keyword suggestions that you can click on to add into your keywords.
You can use the preloaded Lightroom keyword sets, like for portrait photography, which you select from the drop down menu, or create your own sets.
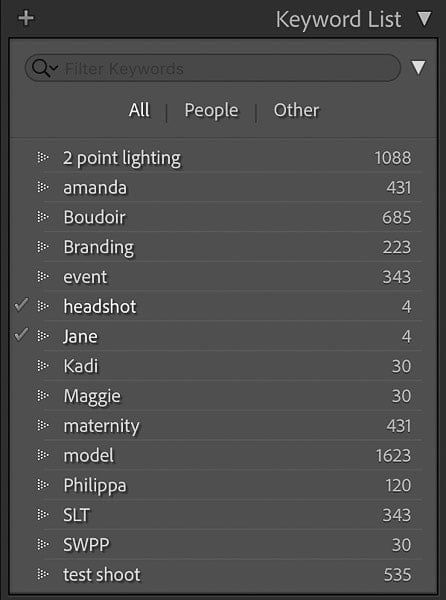
4. Keyword List panel
Here you’ll see a list of all the keywords that have been used on photos in the catalog. It’s both a search tool and a way to assign keywords to a photo.
Mouse over a keyword and you’ll see an arrow on the right of the word and a checkbox on left.
- To add the keyword to your photo check the box.
- To find all photos with the keyword you moused over, click on the arrow. You’ll notice that other keywords that were used with this keyword will also be checked.

5. Metadata panel
Here you can see the metadata information of the camera used, camera settings, lens, focal length, time, date, image number and any additional details that’ve been added to the image.
If you’ve set up a metadata preset to be applied as part of the import process, with details like copyright and contact information, they will also be displayed here if the relevant preset is selected.
6. Comments panel
This is for images that have been exported using the Publish Services panel. The comments shown are those made on the platform on which the image was published, not for adding notes to yourself about your images.

7. Sync and Sync Settings buttons
The Sync button in the Library module is for syncing metadata across multiple images.
The Sync settings button is for syncing develop settings (i.e. the edits you’ve made) across multiple images just like you would in the Develop module. This saves you having to go into the Develop module to sync settings, which is a bit of a time saver.
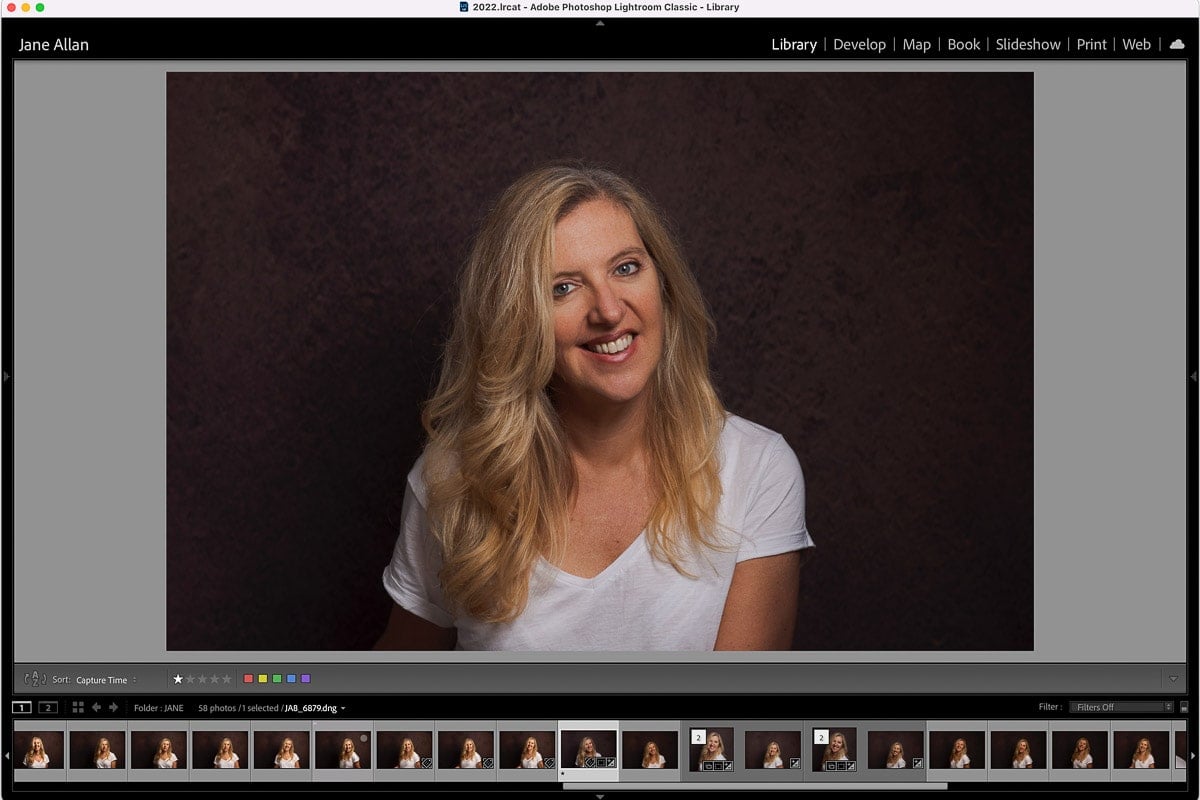
Configure the Library module to suit you
And if you thought Adobe had thought of everything when creating Lightroom Classic, here are a few more tricks they included to make your life a little easier. Clearly they realised how overwhelming all these tools can be, so you have a few additional ways to simplify your workspace.
1. Hide / Show parts of the Library module
Tab – hide/show the left and right panels
Shift + Tab – hide/show all panels
Or hide/show one panel at a time by clicking on the small triangle in the center at the edge of the panel.

I find this function helps to make more space for the active image on a small screen. It also works in the Develop module.
Others like it to reduce the clutter.
2. Solo mode
Speaking of clutter, solo mode is a huge help for simplifying your Lightroom workspace.
When solo mode is on only one of the panels of tools will open at a time. So, if for example you click on Folder and then Catalog, the Folder panel will automatically shut as the Catalog panel opens.
To turn solo mode on or off:
- Hover over a panel header text, like Catalog, and right click
- Select solo mode from the drop down menu
3. Change panel size
Like with all the Lightroom modules, in the Library module you can change the size of a panel by clicking and dragging the edge of a panel.
So, for example, you can make the filmstrip bigger to change the size of your thumbnails so they’re easier to see by clicking on the top edge of the filmstrip panel and dragging upwards. If you can’t see badges on thumbnail photos, just increase the size of the filmstrip and they’ll show again.

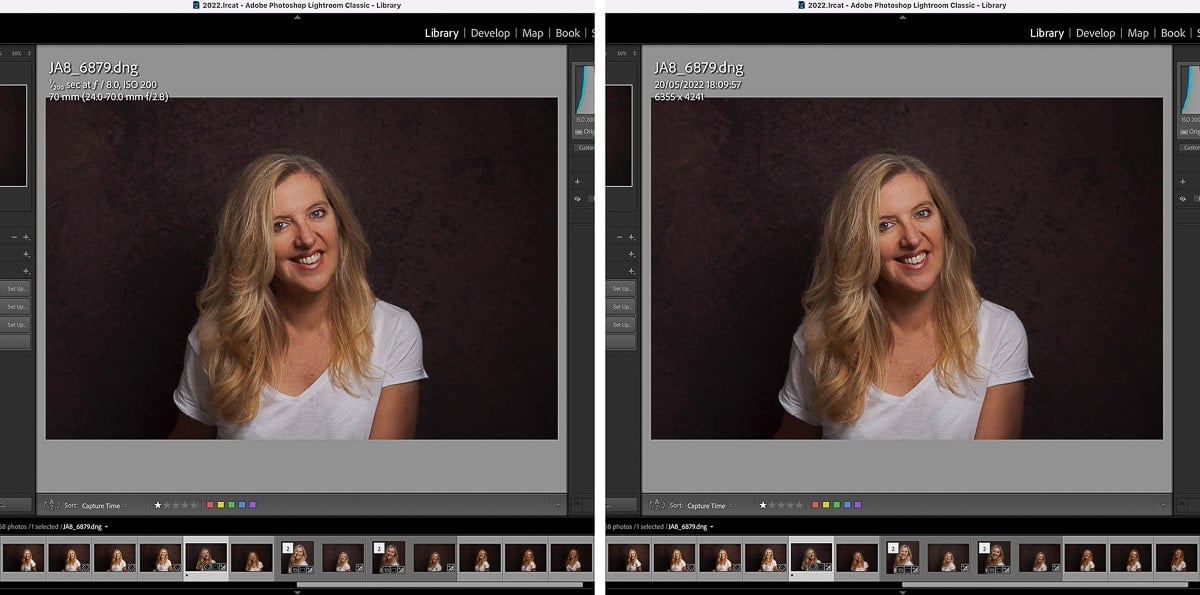
4. Choose how to display info overlays
In both grid view and loupe view you have a choice of what info overlays you’d like to display, if any at all.
In Grid view mode, use the shortcut key J to cycle through three options, or hide the info overlay.
In Loupe view use the shortcut key I to toggle between two options or to hide the info overlay.
Essential keyboard shortcuts for working in the Library Module
Keyboard shortcuts (aka shortcut keys) are a great way to speed up your Lightroom workflow. It’s much faster to hit a key on the keyboard than to move your mouse around the screen and click.
If you make the effort to use the keyboard shortcuts you’ll quickly memorize them and won’t even need to think about it.
B – Add to quick collection
E – Library module loupe view
G – Library module grid view
N – Library module survey view
T – Toolbar (switch on and off)
1 – 5 – rate photo from 1 to 5 stars
6 – 0 – add color label to photo (6 – red, 7 – yellow, 8 – green, 9 – blue, 0 – purple)
Tab – show/ hide side panels
Shift + tab to show/hide all panels (top, bottom and sides)
Caps lock – use in conjunction with B or the number keys to enable auto advance after adding to a quick collection, star rating or adding a color label
Leave a comment
If you have any questions about how to Adobe Lightroom Library module, let us know in the comments.
Also, I love good news, so if my Lightroom tutorial has shown you how to use Lightroom for the different phases of your workflow, share that too.


Very useful article. Thank you. Collections seems very powerful, at least in my case where I have multiple folders from my travels. Learned something new. But that is true with every article I read on your blog.
With best regards,
Sury
I can’t believe I didn’t know about keyword sets. It was staring me in the face! Thanks for that!!
That happens so often! 😉