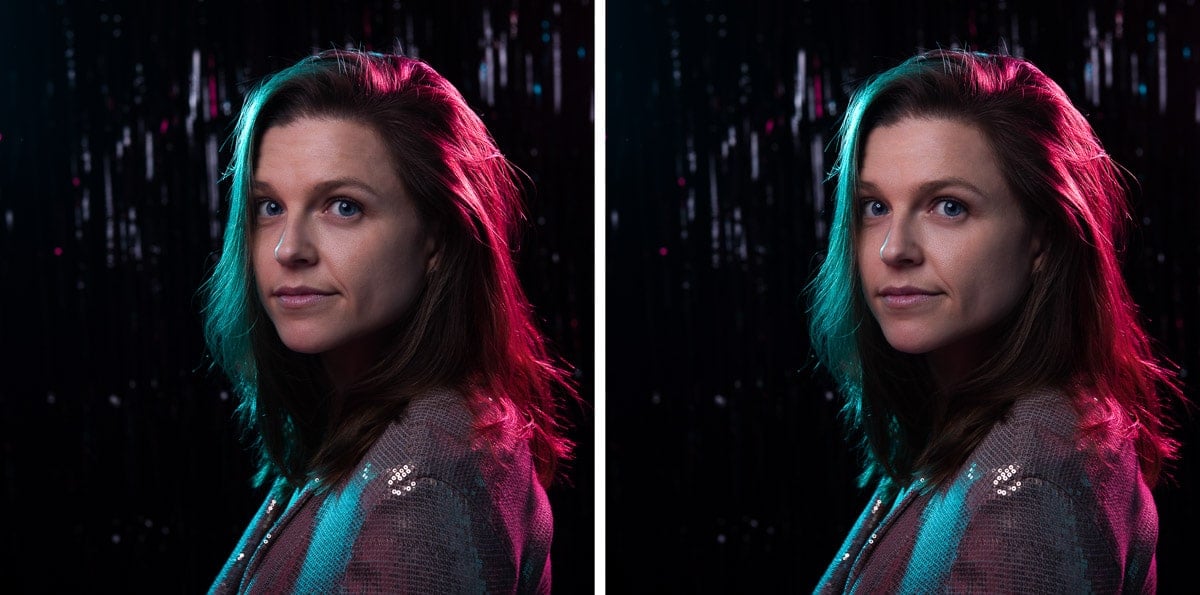
The main benefit of Lightroom brush presets is that they massively speed up your workflow! Plus, using the same brush settings repeatedly creates consistent results for a recognizable editing style. So it makes sense to use Lightroom brush presets as much as possible.
Lightroom brush presets can be used with Adobe Lightroom Classic and Adobe Camera Raw only. The desktop and mobile Lightroom version (used to be called Lightroom CC) doesn’t have brush presets.
The Lightroom brush tool is now one of Lightroom’s masking tools. However, if you have an older version of Lightroom Classic you’ll know it as the local adjustment brush tool.
How to use Lightroom brush presets
You have three ways to use Lightroom brush presets:
- Use the default Lightroom brush preset pack that comes with Lightroom Classic
- Create your own brush presets from scratch or from existing brush presets
- Buy and download Lightroom brush presets
More on this in a moment, but first let’s look at what are brush presets and how to make the most of them.

What are Lightroom brush presets
I think Lightroom brush presets sounds way more complicated and technical than it is.
Lightroom brush presets are saved brush settings that are ideal for edits you always make. Instead of adjusting sliders and dialing in settings each time you want to do something, for example skin softening, you can simply select the relevant brush preset.

Types of Lightroom brushes
What you photograph most will determine the types of Lightroom brushes you use most and therefore the brush presets you’ll find most helpful.
As a portrait photographer specializing in photographing women, the brush presets I use most concentrate on portrait editing, such as:
- Skin softening
- Reducing the appearance of lines
- Evening out skin tone to reduce patchiness
- Dodging and burning to sculpt and smooth facial features
Over time you’ll find yourself saving different brushes in Lightroom for the types of edits you make most.
Difference between brush presets and other Lightroom presets
Brush presets are like other Lightroom presets in that they’re a recipe for a particular set of edits.
However, brush presets are a targeted way of editing an image, because brushes are for very local adjustments. Other Lightroom presets are for global adjustments to an image.

While standard Lightroom presets are listed under presets in the left-hand panel, brush presets are listed under the brush tool in masking, in the right-hand panel of the Develop module.
The keyboard shortcut to open the brush tool, even from the Lightroom library, is K.
How brush presets work in Lightroom
Lightroom brushes can be used for small, almost imperceptible adjustments or dramatic adjustments, depending on how heavily you apply the preset.
Also, you can apply brush presets to small parts of an image or to the entire image, just by changing the brush size!
Lightroom brush presets are highly customizable on a per image basis, without permanently changing the preset itself.
However, brush presets aren’t just for using with brushes, because they’re saved settings that can be used for most types of Lightroom masks.
Previously the same settings could be used for just the local adjustment brush, the graduated filter tool and the radial filter tool. These have also now been incorporated into Lightroom masking. So brush presets are even much more versatile than they used to be.

Why brush presets help in Lightroom photo editing
My top four reasons to use Lightroom brush presets whenever possible…
1. Save time
- It’s far quicker to use a brush preset than to change each of the adjustment sliders each time
- Adjusting an existing Lightroom brush for a specific photo is also easier than starting from scratch
- When you come up with a recipe for a particular edit that works well, and which you might use again, saving it as a brush preset saves time with future Lightroom editing
2. Consistent editing style
How you edit photos is part of developing an easily recognizable photography style. As professional photographers get booked for their style, consistency in editing is important.
3. Customizable to your preferences
Not every photo needs the exact same amount of, for example, skin softening. Adjusting the amount slider of a Lightroom brush preset is a quick way to adapt it.
Lightroom’s default pack of brush presets might not suit you, but you can use them as a starting point to create your own brush presets. Simply adjust the custom brush settings to your preferences and save as a new preset.
4. Enhance creativity
When you don’t feel overwhelmed by the editing process it’s easier to get creative, which makes editing so much more enjoyable.
Besides, photographers are creatives and there’s nothing more mind numbing for a creative than repetitive tasks. Using brush presets cuts down on some of the repetition that’s unavoidable in post production.
How to add brush presets in Lightroom Classic
You have three ways to add your own brush presets in Lightroom Classic:
- Make brush presets from scratch
- Create new versions of default or bought brush presets to suit your needs
- Or buy and import brush presets

1. Make a new brush preset from scratch
Why buy brush presets when you can make your own Lightroom brush presets free? To make a brush preset, once you’ve opened the brush tool:
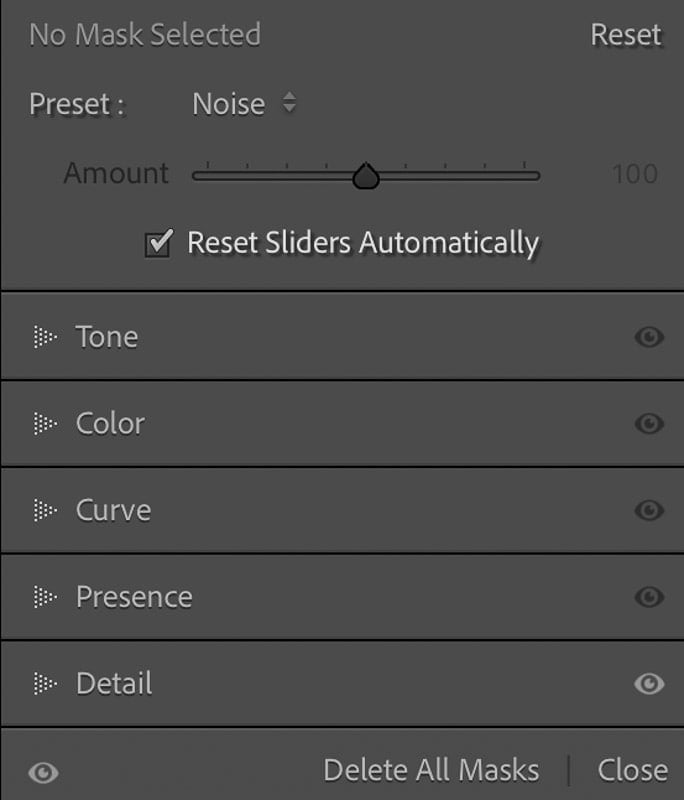
- Ignore the Brush panel and go to the brush Preset panel
- Click Reset to reset all the sliders to zero
- Adjust the relevant sliders in the Tone, Color, Curve and Presence panels for the desired effect
- Click the two little triangles next to the preset name
- Scroll to the bottom of the brush presets list

- Click on “Save current settings as New Preset”
- Enter the name of your new preset in the “New Preset” dialog box that opens
- Click Create

2. Create a new version of an existing brush preset
Any existing brush preset can be used to create a new one. To select a brush preset as the basis for making a new brush, after opening the brush tool, click on the little arrows next to the currently selected preset.
- Open the list of presets by clicking on the two little triangles next to the name of the preset

- Scroll down to the brush preset you want to adjust
- Make your adjustments
- Click on the little arrows again

- Scroll down to the bottom of the brush presets list and click “Save current settings as New Preset”
- A “New Preset” dialog box opens
- Give your new preset a name and click “Create” to save your new brush as your own preset
If you accidentally overwrite your new settings to a default preset, you can simply scroll to the bottom of the presets list and select Restore Default preset “preset name”.

If you make changes to a default preset that’s above the line in the menu, you can only:
- Save current settings as New Preset
- Restore Default preset “preset name”
Tweak custom brush presets without changing the preset
You don’t have to use the exact brush settings of your selected preset brush and you don’t have to save your settings.
Just like with using the brush tool without a preset, you can adjust the sliders of Lightroom brushes to suit your needs. This won’t change the brush preset, unless you then save the changes as a new preset.
3. Import Lightroom brush presets
Another way to add brush presets to Lightroom Classic is to buy them from reputable sellers and download them to your computer. From there you can then import presets to Lightroom.
To install new brush presets in Lightroom Classic:
- Make sure to first exit and close Lightroom
- Copy and paste your presets into the Local Adjustments Presets from the folder where you downloaded them
- Restart Lightroom
- Click the Brush tool and look for your new presets in the brush preset menu

Examples of Lightroom brush presets I use
Here are four examples of brush presets that I use regularly in portrait editing…
1. Skin smoothing (aka skin softening)
The default Lightroom portrait brush preset for skin smoothing, called Soften Skin (Lite), wasn’t quite what I wanted. So, rather than start from scratch, I adjusted it until I was pleased with the effect and saved it as a new preset under a new name.
I did the same with the default teeth whitening preset and a few others.
2. Dodging techniques
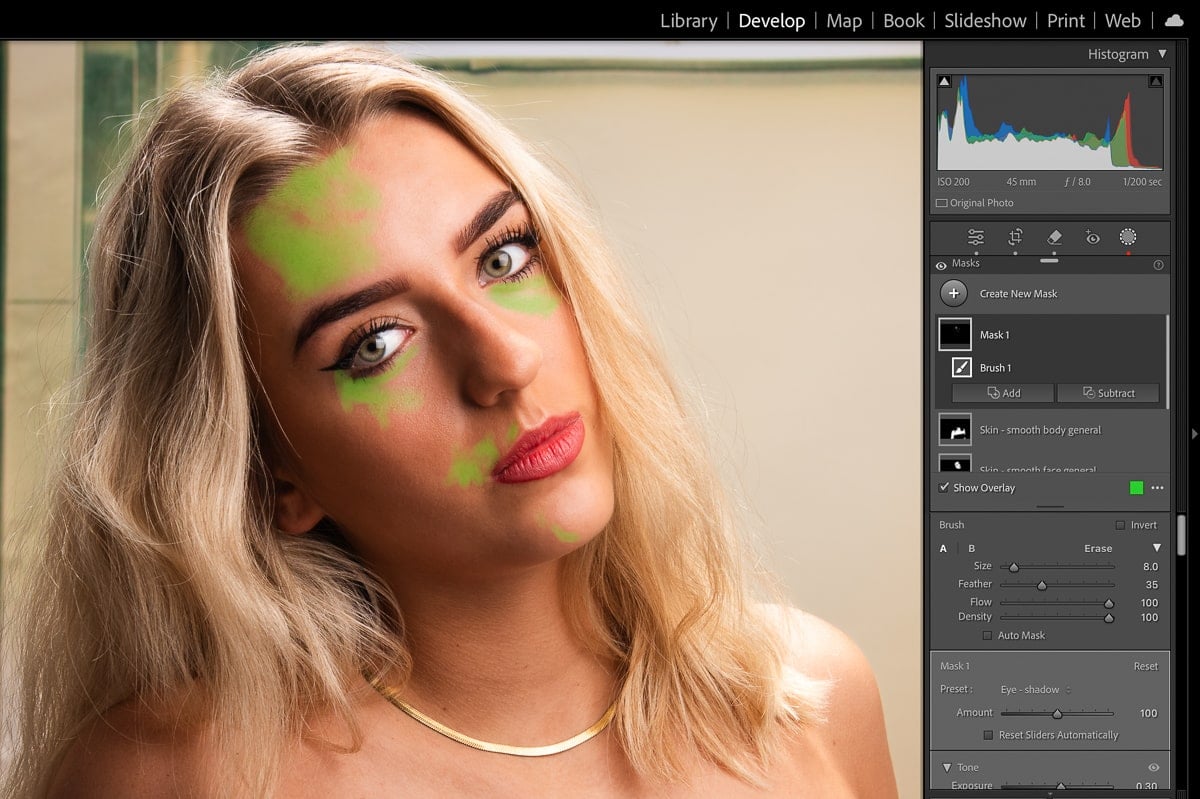
One of my most used portrait brushes is the one I’ve called Eye Shadow and it’s saved me a lot of time.
It’s for lightening under eye shadows, removing signs of puffiness under the eye and dodging shadows on foreheads for a smoother look. I created it several years ago and use it with every photoshoot.
3. Selective color correction or adjustments
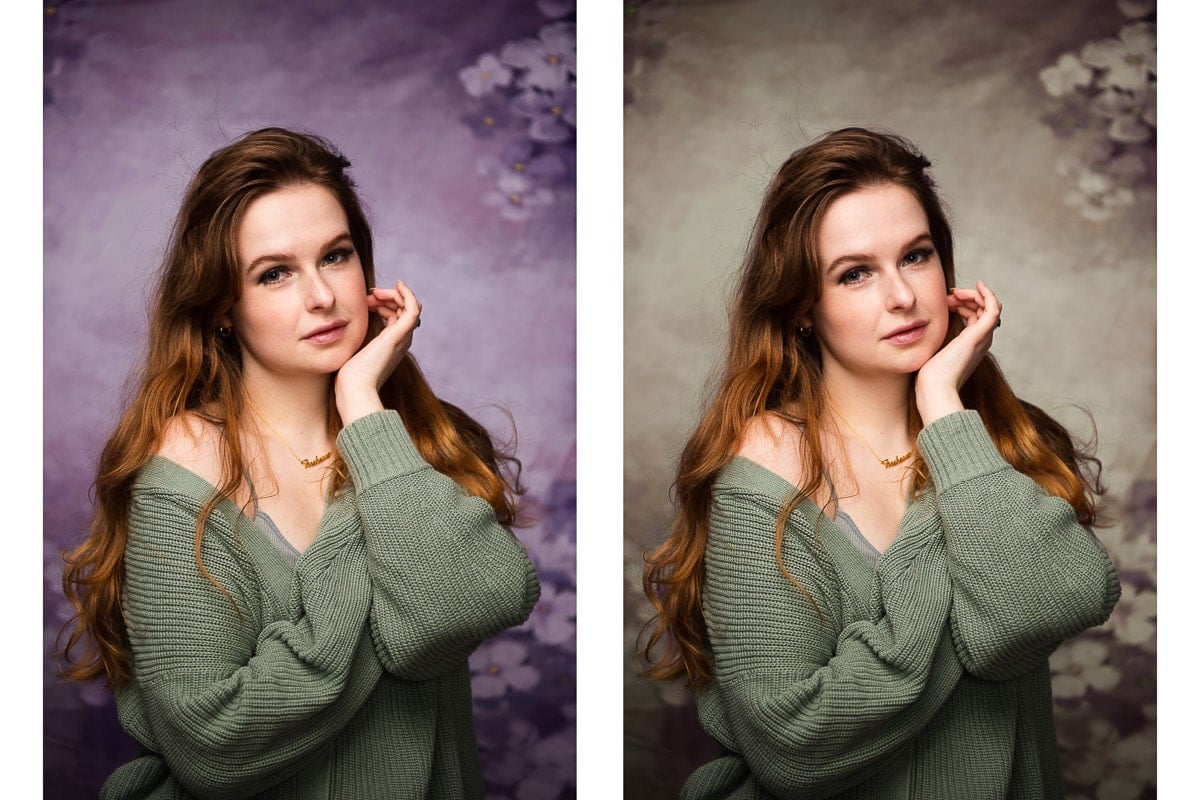
I hire different studios for photoshoots and one of them has an ugly pink carpet, so I used to avoid full length photos or photos that included the floor. Then I realised that I could just change the color of the carpet to gray with a Lightroom mask.
So, because I use this studio regularly, I created a brush preset to quickly and easily change the carpet color.
4. Vignette preset brush
I often use my fake wooden floor backdrop for portraits with dramatic lighting. So I created a custom vignette brush preset, called Floor Vignette, to add to the drama quickly in post production. It’s a less uniform vignette than the Post-Crop Vignetting in the Effects panel.
PS – obvious rather than creative is the best way to name presets.
Organize brush presets for easy access
Given that we use brush presets to save time, it make sense to also keep them organized so that you can easily find them. Brush presets are arranged alphabetically, so bear this in mind when naming a brush to save you time looking for the right one.
For example my eye brushes are named:
- Eye Iris Enhance
- Eye Iris Intense
- Eye Shadow
- Eyes White

If you haven’t done this, don’t worry, it’s really easy to rename them:
- Select the brush preset from the preset drop-down menu
- Scroll to the bottom of the brush presets list
- Click on Rename preset “preset name”
- The Rename Preset dialog box opens
- Enter the new name for your preset
- The Rename button becomes active and you can then click it to rename your preset

I created temporary brush presets to change the color of the door and also the color of the embroidery on her sleeves to create a more harmonious color scheme.
Delete Lightroom brush presets you don’t need
I often create a preset if a specific feature needs to be adjusted in more than one image from a photoshoot. For example, changing the color of a door in the background.
As a result, over time I build up several presets I won’t use again. So every now and then I go through and delete unnecessary presets to keep my preset list manageable.

To delete a brush preset in Lightroom Classic:
- Select the brush preset from the drop-down menu
- Scroll to the bottom of the brush presets list
- Click on Delete preset “preset name”
- A dialog box opens asking if you want to delete it
- Click the Delete button
The only brush presets that can’t be deleted are the default ones above the line in the brush preset menu.
How to make the most of Lightroom brush presets
Create different versions of a brush preset that you use regularly by making separate brushes for each use. For example, I have Soften Skin Face and Soften Skin Body. The only difference is the intensity of the settings, but it’s quicker to select the one I want than to have to adjust it for each use.
Use brush presets with other Lightroom editing tools. For example, the soften skin brush can also be used as a Face Mask.
Shortcuts for Lightroom brush presets
I use shortcuts to speed up workflow and highly recommend them. The keyboard shortcuts relevant to this Lightroom tutorial are:
- D – Develop module
- K – brush tool
Leave a comment
If you have any questions about Lightroom brush presets, let us know in the comments.
Also, I love good news, so if my Lightroom tips have helped you to create your own brush presets, share that too.


I have a number of ‘brushes presets .irtemplate’ can I import them into masking
If so how do I do this.
If they’re already on your computer, when you open the masking tool and click on brush you should be able to select them from your list of brush presets in the right hand panel.