
The Lightroom HSL sliders, in other words the hue, saturation and luminance sliders, are the secret behind color grading photos in Lightroom Classic. Using the HSL sliders you can massively change the look of an image. Once you know how to use hue saturation and luminance you’ll open up a whole new level of creativity in your Adobe Lightroom editing.
So what exactly is HSL in Lightroom, where do you find it and how do you use it?
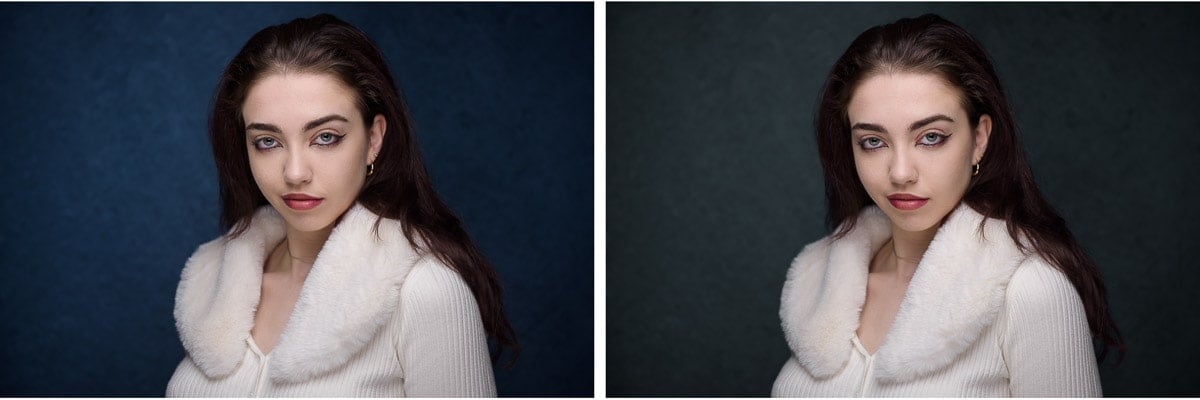
At the end I’ve included examples with details on how to adjust blue skies, green vegetation and orange skin tones.
What is HSL in Lightroom?
The HSL sliders are one of the most powerful ways of adjusting color in Lightroom. You’ll find that they’re used heavily in most Lightroom presets, along with the RGB tone curve.
HSL stands for hue saturation luminance and each of these is a separate slider for making subtle adjustments, sometimes not so subtle. This is crucial!
Instead of adjusting color across an entire image, with HSL in Lightroom you can target specific colors to adjust. This is why HSL is such a huge part of creating Lightroom presets.

What is hue in color?
Hue refers to the actual color of a color and depends on the dominant wavelength of the light. Let’s take the color red for example. As you know there isn’t just one red, there are all kinds of red. We even have different names for different reds – here are just a few:
- Cherry red
- Blood red
- Burgandy
- Fuscia
However, there’s only one pure red, the hue. Any change in the color red is as a result of adding:
- White (tint),
- Gray (tone) or
- Black (shade)
As you move around the color wheel the hue changes from red to orange to yellow to green to aqua to blue to purple to magenta and then you’re back to red again.

What is saturation in color?
Saturation refers to the intensity of the color – how vivid or dull it is. So some reds are redder than other reds. That’s because the color is more saturated.
As a color becomes less saturated it becomes more gray until it’s completely desaturated and is simply a gray tone.
What is luminance in color?
The third element of HSL is luminance and this refers to the brightness of a color. So when you adjust the luminance of the color you make it brighter or darker.
We’ll get into the details of this in a minute. What I will say for now, is that if you’re a portrait photographer, you’re going to love the luminance slider for adjusting skin tones in Lightroom!
What does each slider do in Lightroom?
You might wonder why you’d need three sliders to adjust color. Well, that’s because there are three aspects to color:
- Hue
- Saturation
- Luminance
You probably guessed that’s what I was going to say.
Hue sliders
If you want to change a color slightly, or completely, the hue slider is a powerful tool. But there are limitations, each color on the color wheel can be changed into its adjacent colors only. You can’t make blue yellow as they’re opposite on the color wheel.
So, for example:
- Red can be changed into pink or orange
- Blue can be changed to aqua or purple
- Green can be changed to aqua or yellow
If you take a look at how the sliders are laid out in the HSL/Color panel you’ll see that they follow the same order as the color wheel. Helpful!
I often use the hue slider to change my blue background into a teal or purple background without affecting skin tones at all. This gives me extra variety in studio shoots without having to have loads of backdrops.
Saturation sliders
When using the saturation slider in the HSL panel you adjust the saturation of a specific color, or closely related colors, rather than the entire image as you would with the saturation slider in the basic adjustments panel.
It’s a very effective way of making an image pop with a specific color while dimming down other colors.
Luminance sliders
So if luminance refers to the brightness of a color, it makes sense that the luminance slider is used to adjust a color’s brightness.
If you want to make a blue sky darker for more drama, reduce the blue slider. Or brighten it by increasing the blue slider.
Unlike the vibrance and saturation sliders in the basic panel, none of the other colors will be affected. And this is why editing color in Lightroom is so powerful!
Where are the HSL sliders in Lightroom?
If you go to Lightroom’s Develop Module, you’ll see that the HSL/Color panel is the fourth one down on the right hand side of the screen, under the Tone Curve panel and above the Color Grading panel.
The HSL/Color panel is divided into two panels:
- HSL panel
- Color panel
While it might seem that these are two separate functions – HSL and Color – they’re actually the same tool. Adobe Lightroom has simply given us two different ways of working with hue saturation and luminance.
What is the difference between HSL and Color in Lightroom?
This may seem confusing at first, but the HSL/Color panel just offers a variety of ways of doing the same thing, depending on how you like to work.

HSL panel
If you click on HSL in the HSL/Color panel you’ll see that there are four tabs:
- Hue
- Saturation
- Luminance
- All
Some photographers like to work on just one aspect of color at a time, so choose to have only one set of sliders visible at a time to eliminate distraction:
- Hue tab – displays hue sliders only for all 8 colors
- Saturation tab – displays saturation sliders only for all 8 colors
- Luminance tab – displays luminance sliders only for all 8 colors
I prefer to use the All tab to adjust color in Lightroom.
All eight color sliders are grouped under each of the three aspects of color – hue, saturation and luminance, which are all displayed. It’s a great way to see all HSL adjustments at a glance and I can move quickly between hue saturation and luminance.
![]()
HSL targeted adjustment tool
Before we move on, you need to know that there’s yet another option – the targeted adjustment tool. I really like this and I’ll show you why in a moment.
How this works is that you:
- Click the targeted adjustment tool icon next to the color attribute you want to change in the HSL panel (hue saturation or luminance)
- Position your cursor over the part of the image with the color you want to adjust
- Click and drag up to increase or down to decrease the hue, saturation or luminance of the area
It’s often more effective than using just the HSL sliders, because Lightroom automatically picks up on similar hues in the area and adjusts them too. You’ll see what I mean in the examples further down.

Color panel
If you prefer to work on just one specific color, you might like this HSL option. Click on Color in the HSL/Color panel and you’ll see 8 colored circles and 1 color wheel at the top of the panel:
- Red
- Orange
- Yellow
- Green
- Aqua
- Blue
- Purple
- Magenta
If you click on the red circle, for example, a panel of hue, saturation and luminance sliders just for the red hue in the image appear.
This will allow you to work on just the red and eliminate the distraction of seeing the other colors. If you prefer fewer distractions when editing photos, this is a great option for you.
Alternatively, if you click on the color wheel at the top right of the Color panel, all the colors appear with all the HSL sliders grouped under each color.
Unlike in the HSL Panel, the HSL sliders of each color are grouped together. This allows you to work on one color at a time, but see overall color adjustments at a glance.
How do I use HSL sliders in Lightroom? Examples
Okay, that’s all the theory done. Whichever way you choose to use the HSL/Color panel, the impact of the adjustments is the same. Let’s get into the specifics of HSL Lightroom with examples.
You’ll see why the HSL tool is one of my favorite tools in Lightroom.

Green vegetation
The current trend for green vegetation in portraits is that it should be less green. I’m sure this will change at some point, but for now you’ll see many images with desaturated, dark greens in dark and moody images all over Instagram.

To do this you need to adjust both the yellow slider and green slider for hue, saturation and luminance until it matches your creative vision for the image.
If you use the targeted adjustment tool it will adjust both green and yellow at the same time, because green vegetation contains yellow as well.

You know how sometimes healthy green grass appears positively neon in images? This is most often the case when the sun is high in the sky and shining brightly. It’s very distracting and HSL is a very effective tool for fixing it.
I’d recommend using the targeted adjustment tool so that Lightroom adjusts the relevant hues for you.

- Click the green hue icon, place your cursor over the grass, and click and drag up to make the grass less yellow
- Then select saturation and drag the cursor down to desaturate the grass
- Finally select luminance and click and drag down until the grass is a more natural color
You might need to go back and make small adjustments to the individual sliders to perfect the color.
Further reading: How to get brown tones in Lightroom – and create your own preset

Blue sky
A blue sky with white clouds can really pop with a quick adjustment of the HSL settings. Slide the:
- Blue hue slider and possibly also the aqua hue slider to the right slightly
- Blue saturation slider to the right to increase the saturation of blue tones
- Blue luminance slider to the left to make a light blue sky into a dark blue sky
Or use the targeted adjustment tool in each of the hue, saturation and luminance tabs. Click and drag upwards on a point in the sky to increase HSL settings or downwards to decrease HSL settings.
The aqua sliders might also move, because the sky often contains aqua tones. And this is why it’s often my preferred way of making color adjustments! Lightroom picks up on colors we don’t notice.

Skin tones
The HSL Panel is fantastic for color correcting skin tones and, as there are so many different skin tones, it’s really handy to have one tool that works for all of them! Here’s an example of how to make white skin less pink…
- Slide the orange hue slider to the right
If you look closely at the slider you’ll notice that the left is pink and the right is yellow/green. As green is a complementary color of red and opposite on the color wheel, it cancels out red. So, as you slide the orange slider to the right, the redness disappears. - Decrease red saturation and/or orange saturation by moving the sliders to the left.
- Increase red and orange luminance by sliding them to the right.
Or
- Click on the hue targeted adjustment tool
- Place your cursor over the particular color you want to adjust and
- Slide up to move the hue sliders to the right or down to move the hue sliders to the left
- Then do the same for saturation and luminance
Leave a comment
If you have any questions about using the Lightroom HSL tool, let us know in the comments.
Also, I love good news, so if my Lightroom editing tips have helped you, share that too.
Excellent explanation of HSL in Lightroom. I have been using Lightroom for over 6 years, and I still found useful information here.
Thank you – really appreciate your comment!
Many thanks for the clarity of this and other articles. Very helpful and you have encouraged me to do more of this.
Thanks Jane! This contents of your article is a valuable helping for me.
Best wishes…!
Great to know, thanks Lin