

Lens flare is great when you want it in a photo and many times photographers add a fake lens flare to photos in post production. However, when you’ve got unwanted lens flare, you’ll need to remove it in post production. You can do it in many ways and with different types of photo processing software. Here’s how to remove lens flare in Lightroom Classic.
To find out what causes lens flare and how to avoid it so that you don’t have to spend time in post production removing it, read to the bottom
PS – all the photos in this Lightroom tutorial are unedited so that you can see the lens flare effects straight out of camera.

What is lens flare?
Lens flare in photos has many names, because it can look quite different, depending on what caused it and how it appears in the image. So you might also have heard lens flare called:
- Sun flare
- Sun spots (or sunspots)
- Light spots
- Lens glare
- Light flare
- Light streaks
What does lens flare look like?
Because it comes in all shapes, sizes and even colors, Lightroom has various tools for removing unwanted lens flare. So, before I show you how to remove lens flare, let’s take a look at some of the types of lens flare…


How to remove lens flare from a picture – smudges
Sometimes all you need to do is adjust the dehaze slider in the Devleop Module to remove lens flare in Lightroom.


The shape of the lens flare will determine the best option for removing it. The Lightroom tools best suited to removing lens flare that’s smudgy are:
- Lightroom radial filter
- Lightroom graduated filter
- Lightroom adjustment brush
Filter and brush settings in Lightroom
Once you’ve decided on the best tool for the shape of the lens flare, adjust the exposure sliders in the Lightroom Devleop module. The exact adjustments you make will depend on the image and how the lens flare affects the image, so it’s impossible to give you a “one size fits all” easy fix recipe.
But I’ll show you how each of these tools works so that you can decide on the best option, or combination, for your image.
- Contrast
- Whites
- Blacks
- Clarity
- Dehaze
Pro tip – for a smoother transition make sure that you set the feather on the brush tool to at least 25. Likewise on the radial filter and graduated filter click and drag on the filter to increase feather.
Steps to remove lens flare
Here’s a side by side comparison of the result of each edit in the steps listed below. The flare was caused by my flash fitted with a half CTO gel to warm up the light for a golden hour appearance.

Step 1 – radial mask
I clicked on the masking tool to open the masking dialog box, then selected the radial mask.
I increased the feather amount for a very slow transition so that the settings blended well with the unaffected areas of the image.
I reduced exposure, contrast, highlights, shadows, whites, blacks and saturation and then increased the clarity and dehaze sliders to add back some definition.

Step 2 – masking with the brush tool
I then created a new mask with the brush tool so that I could paint/brush over light areas that needed further darkening without impacting the already dark areas.

Step 3 – dehaze tool
I increased the dehaze slider to add contrast.
Step 4 – adjust vibrance
Increasing the dehaze slider can make an image more saturated, so I decreased the vibrance slider in the basic panel to counteract it and correct the dehaze effect on her skin tone.
My final step was to reduce the yellows with the yellow saturation slider in the HSL panel.
Step 5 – cropping
Because the center of the flared area was so bright, the highlights were blown out.
Even in RAW format blown highlight details can’t be recovered. So in this instance, to completely remove evidence of lens flare I cropped the image to cut out the white hot center of the flare.

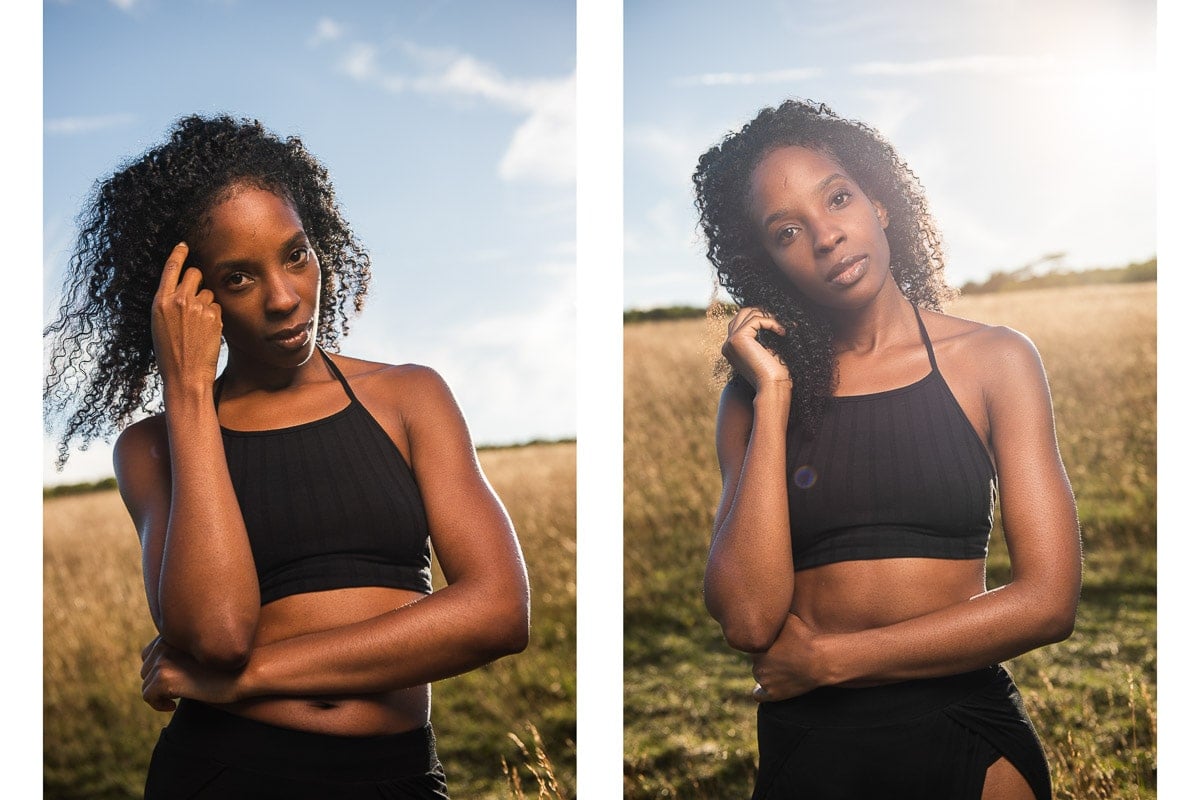
How to get rid of sunspots in Lightroom – bright spots
Getting rid of sunspots and small, bright spots of light in Lightroom is often easier than removing flare that looks like a smudge of light in photos.


Below you can see that, because of the shape of the lens flare, this was a more complex sun spot removal done in three stages with the spot removal tool.
I then used the brush tool to darken the lighter areas and added a bit of green by reducing the tint slider of the brush to reduce the pink of the lighter areas even out her skin tone.

Spot removal tool for getting rid of bright spots in photos
One of the best ways, and certainly often an easy way, to remove bright spots of light in a photo is with the Lightroom spot removal tool, also referred to as the spot healing brush.
A quick way to open the spot removal tool in the Develop module from any Lightroom module is to press the Q key on your keyboard.
Pro tip – for a smoother transition that blends well set the feather on the spot removal tool to at least 25. The exact amount will depend on your image.
What causes lens flare?
When light from a bright light source hits the front of the camera lens it can cause lens flare or sunspots in photos.
- The angle of the sun, or whatever light source you’re using, in relation to your lens heavily affects the lens flare effects it creates in an image.
- Your choice of aperture also affects the appearance of lens flare. When you see light as a starburst in a photo it’s a dead giveaway that a small aperture has been used.
- While lens quality does have an impact on lens flare, even the most expensive lenses can be subject to lens flare if the direction of the sun, or whatever light source you’re using, results in light glancing across the front element of the lens.
- Although a wide angle lens could increase the chance of getting lens flare in an image purely because of the wider expanse of the lens, it won’t cause it.


Lens flare can happen with all types of light, including:
- Natural light
- Constant light
- Flash light
Like with the headline image, when photographing outdoors in the golden hour I often like to include a bit of lens flare in a portrait to give it a warm summer glow. I do this by including either the sun or light from my off camera flash at the edge of the frame. To really add a summer glow with off camera flash I use a half CTO gel on my flash to warm up the light.

How to avoid lens flare?
Your best bet if you don’t want lens flare in photos and don’t want to spend time removing lens flare in Lightroom, is to avoid it in the first place. The good news is that it’s actually really easy to avoid.
To avoid lens flare, just ensure that the front of your camera lens is in shadow.
To create the shadow you can:
- Use a lens hood to reduce lens flare or avoid it altogether
- Shade the front of the lens with your hand or some other object
- Photograph from a patch of shade
- Change your direction to avoid the light source
This isn’t so much about avoiding lens flare, but if you shoot in RAW format (vs JPEG), you’ll be able to fix lens flare issues more easily than with an image shot in JPEG format.
Other options for removing lens flare
Removing lens flare in portraits isn’t as easy as with landscape images, unless your camera was mounted on a tripod and the subject didn’t move between shots.
If that was the case you could simply take one shot with the lens flare included and the second shot with your hand blocking the lens flare. Then combine the images in Photoshop using adjustment layers. Personally, I find Lightroom editing far quicker and easier for most situations, but as I said at the start, there are many photo editing programs on the market and everyone has their favorite.
Leave a comment
If my Lightroom tips have helped you, or you have another way of removing lens flare in Lightroom Classic, I’d love to hear from you in the comments.
As always, excellent tips while shooting and post processing. Thank you!