


It’s virtually impossible to create a film image in digital photography, but you can process images for a general vintage feel and film-like look. I’ll run through some super fast, automated ways to make photos look like film. Then I’ll show you how to make photos look like film in Lightroom with manual edits.
But first… Before you can edit photos in Lightroom to look like film, ensure you photograph in RAW file format for the best results. Not JPEG. RAW files contain much more data, so can be manipulated much more during the editing process.
If you want a quick answer for how to get the film-like effect of digital images popular on social media with both professional photographers and hobby photographers you need:
- Faded blacks (aka the matte look)
- Washed out colors
- Desaturated skin tones
- Increased grain
I think what most photographers are actually asking is how to edit photos for a vintage look in Lightroom, rather than an exact film match. So I highly recommend reading to the end, after my Lightroom editing tips, because… what do you mean by “look like film”?
Does Lightroom have film presets?
Yes, if photo editing feels overwhelming and you just want a quick way to get a film look in Lightroom, there’s an easy way with film presets and profiles.
Lightroom used to have Fujifilm profiles for all camera types. They’ve been replaced in recent versions and are available under camera matching profiles only if you shoot with a Fujifilm camera. However, if you use any other camera brand you can now select from the vintage color profiles.
Or, if you want a 35mm film Lightroom preset free, go to the presets panel in the develop module for free presets. You’ll find several presets you can use for the vintage look in Lightroom and we’ll get to that next.
Or you could create your own free Lightroom film preset using my tips on how to make photos look like film in Lightroom. But more on that later.
How do you add film effects in Lightroom?
You have two options to add film effects in Lightroom – the long way and the short way. There are pros and cons to both.
- The long way to make photos look like film in Lightroom is to make all the edits yourself from scratch.
- The short way to get the film effect is to use Lightroom color profiles or Lightroom presets (bought ones or the default ones that come with Lightroom Classic)
I’ll show you all these methods below, starting with the short ways.
Also, rather than using just one image and saying this is how you do it, I’ve used two completely different images. This demonstrates how different photos require different edits.
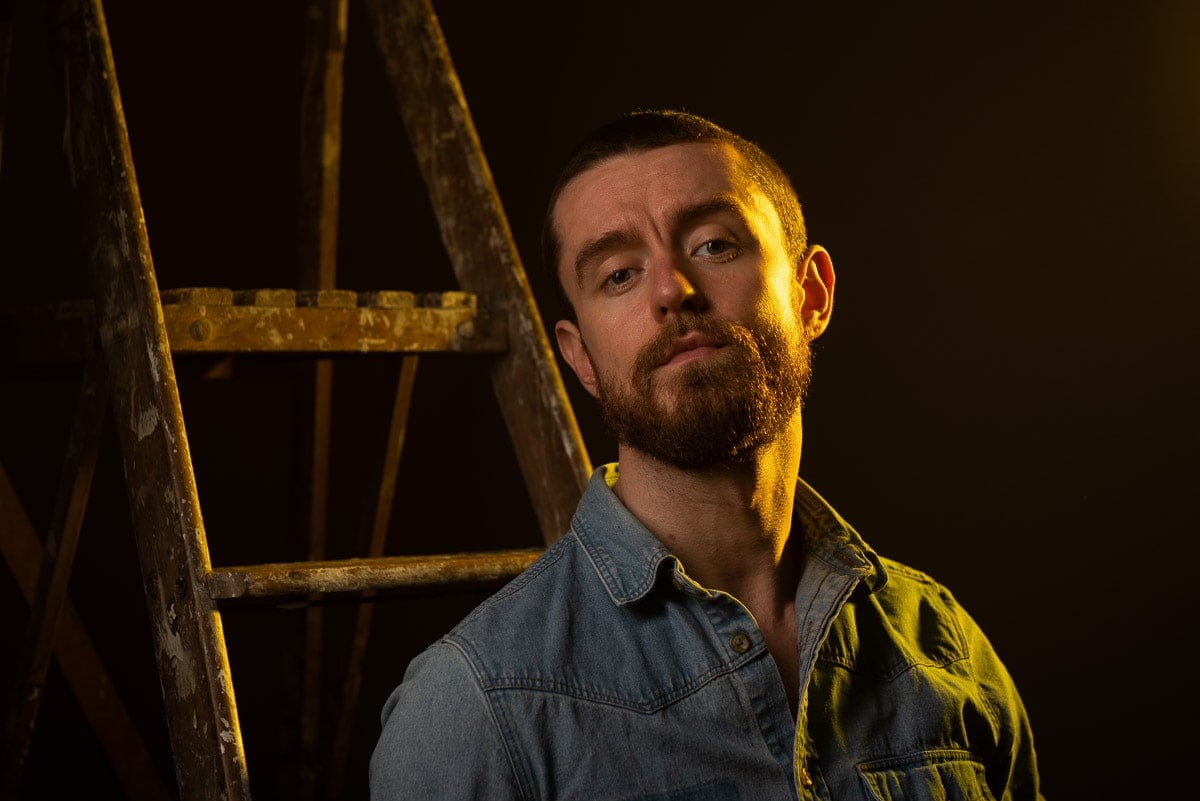
- The image of the man was photographed in the studio using a two light setup. I used white light as a key light to camera left and fitted a yellow gel on the backlight to camera right.
- The image of the woman was photographed with natural light just after the sun sank below the horizon, so the light is flat and warm.
Studio lighting example of the film look

Above is the finished image, edited in Lightroom to look like film. I did this the long way – adjusting the Lightroom settings manually. Below is the unedited image with a neutral color profile, which I used as the starting point for all the preset and profile options in this tutorial.
Natural light example of the film look

Above is the image I processed manually in Lightroom to look like film. Below is the original image with no edits, except for a neutral color profile in Lightroom, which I used as the starting point for the preset and profile options.

Fastest ways to make photos look like film in Lightroom
Now let me show you how quick and easy a film edit can be using Lightroom’s profiles and presets on unedited images.
In each example below I’ve only applied either the profile or the preset. No other adjustments.
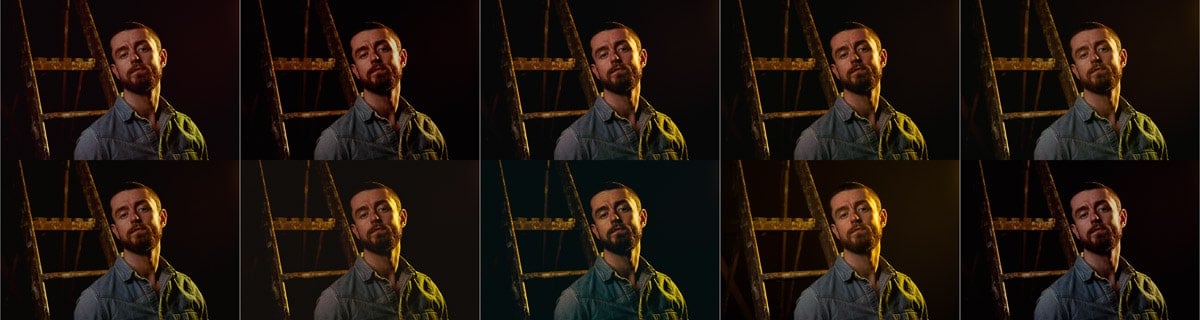
1. Lightroom film effect profiles
One of the fastest ways to make digital photos look like film in Lightroom Classic is to use one of the 10 vintage color profiles included with Lightroom by default.
You’ll find the color profile option just above the white balance tool in the basic panel at the top of the develop module. Click on it to open the menu of choices.

I applied the same vintage profiles to both images so you can see how different the same edits look in photos with different lighting.
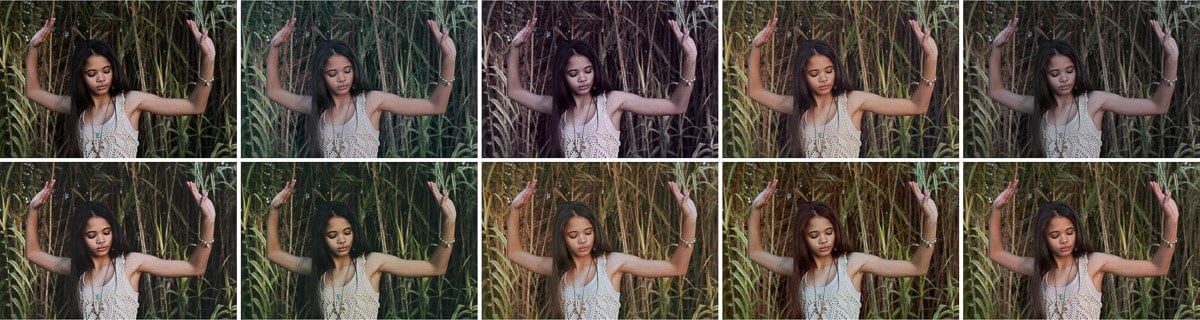
So that’s the quickest option, because you can get the look of film in just two clicks.
2. Lightroom film presets
The next quickest method is to use a Lightroom preset. If you’re looking for a free film preset, use one of the Lightroom presets supplied with Lightroom Classic. You’ll find the preset menu on the left side of the develop module.
Choose from 4 Lightroom preset collections for the film look:
- Auto+Retro
- Style: Cinematic
- Style: Cinematic II
- Style: Vintage
Auto+Retro Lightroom presets for film look
These are my least favorite film look presets, because they auto tone your image at the same time as apply film look effects. In other words, it’s the same as clicking the Auto button under Tone in the Basic panel.
As you can see from my example images, it didn’t do a very good job of the toning on either the studio image or the natural light image.

There are 11 Auto+Retro Lightroom presets. I don’t like how any of them make either the studio shot or natural light shot look, but here they are.

Cinematic Lightroom film look presets
Next, I applied the cinematic presets in the same order to both images. These two collections demonstrate the impact of lighting on the look of a photo, and how that impacts editing. The presets have completely different look on each image.
The 18 cinematic Lightroom presets are divided into two collections:
- Style: Cinematic
- Style: Cinematic II

I don’t like any of the preset effects on the studio shot above, but really like 1, 5 and 8 of the natural light shot below.
Do you like any and would you use the image as is without further editing?

Vintage Lightroom presets
Vintage is another way of saying film look, because analog photography is of course vintage in the modern digital photography world.
I don’t like any of these versions “straight out of the box”, but that’s how it goes with presets. It’s really unusual for them to work without having to tweak your settings. Which is why it’s good to know what goes into creating a particular type of effect in Lightroom. If you understand what Lightroom settings create the film look, you’ll know how to tweak film presets.

How do you make a photo look like film in Lightroom?
Of course presets and profiles aren’t the only way to achieve the film look. Manually editing photos gives you so many options and much more control. Also, there isn’t just one type of film so there isn’t just one type of film look. However, for the film look popular on social media, follow these steps.
Steps to make digital photos look like film:
- Step 1: Shoot in RAW file format
- Step 2: Select Adobe Neutral color profile
- Step 3: Adjust contrast settings
- Step 4: Reduce tonal range
- Step 5: Desaturate colors
- Step 6: Add grain
So, next is my step-by-step guide to get a photo film edit without relying on presets. In other words the long way. Just remember that every shoot is different, so I can only guide you on the Lightroom settings you need to adjust. I can’t give you an exact recipe to use every time.
Starting from the top of the develop settings…
1. Color profile
Just switching from the default Lightroom color profile that’s applied on import (Adobe Color) really helps to get the film look. So switch to Adobe Neutral color profile.
I edited the image below a few years ago before Adobe Lightroom changed their default color profile from Adobe Color to Adobe Standard. It’s less saturated and contrasty than Adobe Color, but these days I prefer Adobe Neutral.

2. Basic panel
The advances in digital photography have given us increased contrast in our images, which adds to the feeling of sharpness in digital photos. So for a film look we need to reduce contrast to get a softer look to images.
However, because you’ve changed the color profile to neutral, you’ll have stripped a lot of the contrast from the image and may need to add some back. Everything depends on the image itself.
The Lightroom contrast tools include:
- Contrast slider
- Whites slider (for white point)
- Blacks slider (for black point)
- Clarity slider (for contrast in midtones)
- Dehaze slider

3. Tone curve panel film edits
The Lightroom tone curve is another Lightroom tool for adjusting contrast. However, tone curve adjustments also adjust color.
Fade blacks with the tone curve
My preference for the film look is faded blacks and I do this by lifting the shadows in the tone curve. Simply lift up the point on the lower left of the tone curve to fade blacks. Just a small adjustment makes a big difference.
Change colors with the tone curve
Staying in the tone curve panel, use the RGB curve to shift colors. The most popular color shift for the vintage look is to introduce more yellow colors to an image.
So, go to the blue curve and drag the tone curve down slightly in the midtones area. In portraits this reduces the pinks in skin tones and shifts them to yellows.
In the series of images above you can see that I used the:
- Red tone curve to add green to the shadows
- Blue tone curve to add blue to the shadows yellow to the midtones

4. HSL panel – change individual colors
As I mentioned, different films create different looks. This is particularly true in blues, greens and skin tones. Some films, like Fuji Velvia created really reddish skin tones, so weren’t suited to portraits, but were great at creating very saturated reds, blues and greens in images. Other film stock, such as Kodak Portrait 800 were ideal for portrait photography, because it produced great skin tones.
Use the HSL adjustment sliders in Lightroom, to shift colors for a particular film look.
For example, in the above image I used color grading mainly to remove the green in the vegetation. I changed the hue of the greens and yellows, then desaturated both colors and darkens them with the luminance sliders. The red slider adjustments in all three HSL panels were to alter skin tones.

5. Color Grading panel – split toning film look
For an even more cinematic look, add complementary colors to the shadows and the highlights. A few popular color grading combinations are:
- Teal in the shadows and orange in the highlights
- Purple in the shadows and green in the highlights
In the color adjustments to the studio shot (left image above) I added blue to the shadows, yellow to the highlights and a dash of orange to the midtones. I balanced the color grading more towards the yellow highlights as I wanted a very warm image.
For the natural light shot I simply added blue to the shadows and orange to the highlights and left the blending and balance sliders alone.
6. Effects panel – add grain for film look
Not all film stock is grainy. I personally prefer not to have grain in images, so haven’t added any to the two images I’ve used in this Lightroom tutorial. However, if you like grain, add it in the Effects panel in the develop module.
You can fine tune the grain settings by:
- Amount – set how much grain you want
- Size – the default size of the grain is 25 and this will show as soon as you move the grain slider
- Roughness – like the size slider, the roughness slider will show only after you’ve increased the amount slider. The default grain roughness is 50

7. Calibration panel – global color shifts
The calibration panel is the final way to adjust colors in an image to get the vintage look. Again, there’s no one way to do this and not all photos need it. In my two image examples I used the calibration settings only on the studio shot.
In the series of images above you can see the before (left) and after (middle) images after adjusting calibration sliders to remove pink from skin tones with the red saturation slider after adjusting the huge towards orange. I also adjusted the green and blue primary sliders for more yellow colors.
If you’re using an older version of Lightroom you’ll find these settings under the camera calibration panel.
How can I make my photos like film?
Getting back to my question right at the beginning… what do you mean by look like film? Here are 3 factors that affect the look of a film image.
1. How paper choice affects a photo
I’m going to be a little controversial here, because if you really want to make digital photos look like film photos you need to print them. Not only that, but you need to be picky about the paper you use, because that’s part of the effect of film photography. Different papers give different looks
Unlike digital photography, where we can see images on the back of the camera, film photos need to be printed.
2. What type of film look do you want?
Film photographers choose different types of film stock for different looks. The most obvious is black and white, sepia or color.
In digital photography we change the white balance to suit the light we’re using. However, with film photography if you’re photographing indoors with ambient light, for example, you need film stock that’s balanced for tungsten light.
What’s more, film photographers can’t just change the ISO to adapt to light levels. Instead, they choose their film accordingly.
For example, the original Fuji Velvia 50 was a 35mm slide film, ISO 50, that was balanced for daylight. So it wasn’t suited to low light photography. It produced beautifully sharp, smooth and highly saturated images, which was why I used it for travel photography. Not all film is grainy.
On the other hand the Ilford XP2 400 is a black and white film that can be printed on color paper for a sepia effect or on black and white paper for (you guessed it) a black and white photo. It can be used indoors and outdoors in different lighting conditions (ISO 400).
3. What size film do you mean?
Digital cameras have different size camera sensors, such as full frame, cropped frame and micro four-thirds. Well, it’s the same with analog photography, except it’s the film that comes in different sizes to suit the camera. And film quality changes with film size. For example:
- Large and medium format film (commercial film photography)
- 35mm film (portrait, wedding and hobby film photography)
- 110 film (beginner film photography)
- Disposable camera film (great for party pictures)
My very first camera that I got when I was about 7 used 110 film. For grainy and not at all sharp I highly recommend this little film format. I’m joking, but don’t use it.
So, that’s why when looking for film presets, or asking how to make photos look like film, photographers are actually asking how to edit photos for a vintage look in Lightroom.
Do professional photographers use Lightroom presets?
Yes, absolutely, professional photographers use Lightroom presets!
Lightroom presets and preset brushes in Lightroom Classic are a great way to save time editing a photoshoot. Some buy presets and tweak them. Some create their own presets to suit their particular lighting and editing style.
Leave a comment
Let me know in the comments if you have any questions or suggestions on how to make photos look like film in Lightroom Classic.
Also, I love good news, so if my Lightroom tips have helped you to create a film effect, share that too.
Hello and thank you for your thoroughly written article. As I still or better never stopped to use a lot of film, mostly black and white, which I develop/ enlarge/ print in my own darkroom, I do miss films like Kodachrome 64 or the Velvia 50 you mentioned above. Those where my favorites color films for travel, landscapes, seascapes and city, but it depended on where I traveled to and what time of the year, which film I used. Now reading your article reminded me again of them. Indeed, I tried many different presets for LR to get similar results … but still, when I go for bigger (from A5/6×9 on) I either use 35mm or 6×6 and Kodak Portra in its different ISO (160-800) with its fine grain and subtle colors for color prints, or mostly Ilford hp/fp/xp2 for black and white, sometimes Fomapan, always depending on the given circumstances.
When it comes to digital, I use to change given/ downloaded or create my own presets in LR for the different cameras (Leica M, Nikon D,Z) I use, the job/event and my or the customers wishes, ideas, preferences. Those photos will then be printed in a book, and – up to A4/ 9×5 – to be framed. And of course I mostly give a selection of files to the customers … what they do with them is their decision.
Anyway, I do not really know if I always would see the difference when I e.g. visit an exhibition or see photos hung on other people’s walls. But I know and then see them with photos shot by me … here I am satisfied when I do it like written above: book and smaller prints (for keepsakes for family and friends) digital, bigger prints from film negatives (as long as I can and want to afford the skyrocketing prizes).
Always good light! Regards from Germany.