


The great thing about learning clamshell lighting for portraits is that the name tells you everything you need to know to get started.
It actually describes the light setup, if you use your imagination a little. You use two lights arranged like the top and bottom shells of a clamshell and shoot through the space between the two where the hinge of the clamshell would be.
What is clamshell lighting?
Beauty and fashion photographers most commonly use clamshell lighting, but not exclusively. It’s also a popular lighting technique for head shots and portrait photography.
That said, if you look at most magazine covers, you’ll see clamshell lighting in use, or at the very least butterfly lighting (that’s a clue to the clamshell lighting setup).

The great news is that to create clamshell lighting you don’t need a lot of lighting equipment as it’s quite a simple lighting setup. Clamshell lighting can be either:
- A two light setup
- Or a one light setup plus a reflector
So how do you set up clamshell lighting?
Given that the clamshell lighting pattern is so minimal in terms of equipment and easy to use, it offers a lot of flexibility in the types of looks you can create. You control the lighting with:
- Position of lights
- Power of lights
- Light sources

1. Position of lights for clamshell lighting
The most relevant point about clamshell lighting is that it’s frontal lighting. In other words the light direction comes from the front of the subject.
A beauty dish is the most commonly used light modifier for clamshell lighting. You can use other light modifiers, but we’ll get to that in a moment.
Next crucial factor in clamshell lighting, is the angle of the light.
Set your key light directly in front of your subject and angle it at a 45-degree angle down toward the subject. So the light is higher than the subject, preferably with the bottom of the beauty dish in line with your subject’s eyes.
The higher you raise the beauty dish, the longer the shadows will be beneath the nose, lips and chin.
If you think this sounds just like butterfly lighting, you’re right. So far. There’s one more step that takes it from butterfly lighting (aka paramount lighting or beauty lighting) to clamshell lighting.
Position another light as fill light below your subject’s chin or chest facing up at a 45-degree angle. This will leave you with a small gap between the two lights through which you can shoot.
Because you have two lights on light stands directly in front of your subject, with you trying to shoot through a gap between the two, it gets a bit squished. I suggest putting the upper light on a boom arm in front of your subject so that the light stand isn’t in your way.
2. Power of lights for clamshell lighting
Now that you have your lights in position, you need to adjust the power.
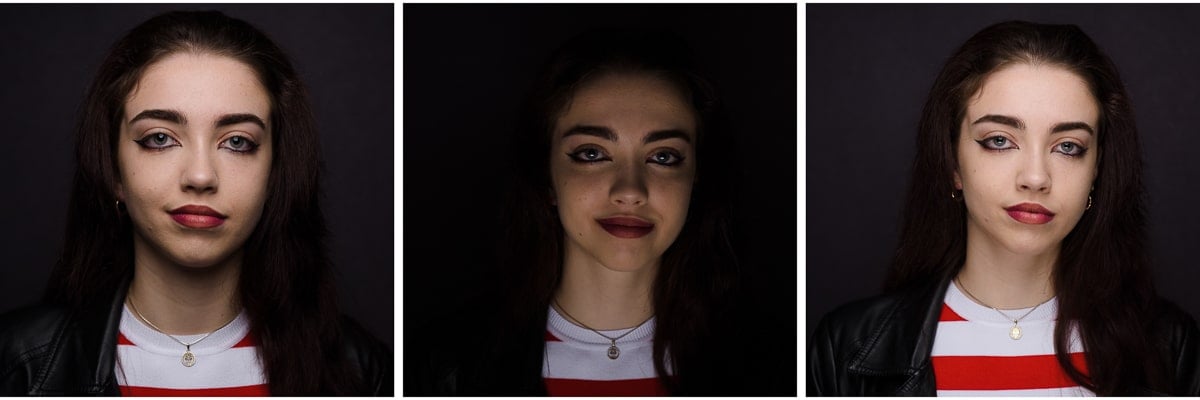
Make sure that the lower light isn’t brighter than the upper light, otherwise you’ll end up with very unflattering shadows going up instead of down. Also jokingly referred to as monster lighting, as you can see above. How much lower depends on how deep you want the shadows to be. It’s a matter of personal choice.
In a clamshell setup the upper light is your main light source, your key light, and the lower light is your fill light, which is another clue. The lower light is there to fill in the shadows from the key light and give the glowing effect synonymous with clamshell lighting and beauty photography.
Prefer minimal shadows on your subject’s face?
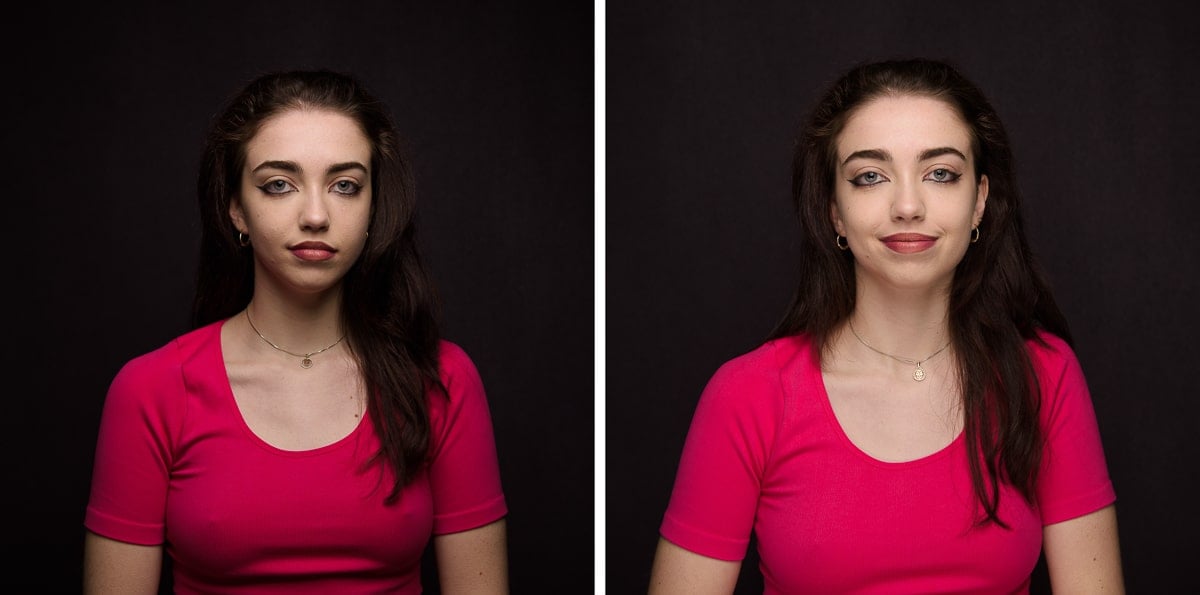
If the lower light is at the same power as the upper light, you’ll cut out all shadows and create a flat light effect.
If that’s the look you want, great, but what I like about clamshell lighting is that you get the butterfly lighting pattern benefits of chiselled features, but with softer shadows. So the subject’s face is defined, but shadows are not as deep, because they’re filled in by the beautiful soft light of two big (relative to the subject, because they’re close) frontal light sources.

3. Light sources – using a reflector as fill
At the beginning I mentioned that you don’t need to do a two light set up, you can do clamshell lighting with one light and a reflector.
In fact, you don’t need an actual reflector. Any white, silver or gold reflective material can be used. What’s important is that you position it below your subject’s chin or chest so that it catches the light from the key light and bounces it back up into their face.
To soften the impact of the reflector as a fill light, simply adjust the angle to feather the light. In other words angle it slightly away from your subject so that the full impact of the key light doesn’t hit the reflector and bounce it all back up.
Before we move on, I mentioned white, silver or gold as a reflective material. Bear in mind that the shinier the material, the crispier the light will be.
For a soft light use a white surface – either the white side of the reflector or a white piece of card. Silver is highly reflective and therefore creates a harder light than white. The same goes with gold, plus it also adds a very warm color cast.
So be careful about what you use as a reflector.
One last point – if you have just 2 lights and a reflector, you can do a 3 point light set up using one light and the reflector for clamshell lighting and the second light as a hair light for separation.
Clamshell lighting modifiers
Speaking of different ways of using the clamshell setup, there’s so much more you can do than simply control the depth of the shadows.

Light sources – hard vs soft light
Although beauty dishes are the most commonly used type of modifier for a clamshell set up, you have a lot of flexibility with clamshell lighting. So you can also use a softbox for a softer light. If your subject doesn’t have incredibly good skin, the soft light option is better.
If you use a soft light as key light, your fill light should also be soft light and likewise for hard light (hard key, hard fill). So, for example, if you use a:
- Softbox as key, use a softbox for fill or a white reflector
- Silver beauty dish as key, use a silver reflector for fill light
- Silver reflector dish modifier or bare bulb as key, use a silver reflector for fill light
Also bear in mind that a beauty dish with a white interior produces softer light than a silver beauty dish. To soften the light further you can fit a diffuser to the front of the beauty dish.

My light modifier of choice for clamshell lighting is a white beauty dish with a layer of diffusion.
However, I’ve also used a large, deep white umbrella for super soft light that wraps around the subject.
For fill light I use either a strip box, or the white side of a reflector.
I like soft light, but I also like high contrast, so when using a second light source for fill, my fill light power is normally at least one stop below the power of my key light.
To find what works best for you and your style, experiment with different light sources, light power levels and light modifiers for different effects with hard or soft light.
Clamshell catchlights
When you see two sets of catchlights in the subject’s eyes, at the top and the bottom, you know clamshell lighting has been used.
But you can’t always see two sets of catchlights. Some photographers stick to the rule that you should only have one set of catchlights.
If this is your preference, you need to be careful about the positioning of the lower light or reflector to ensure that it doesn’t create a visible catchlight in your subject’s eyes. Or remove it in post.
Personally, I see nothing wrong with two sets of catchlights.
However you feel about one vs two sets of catchlights, the most important thing is that you take care to ensure the key light creates catchlights. This is what gives the eyes life.
As every face is different you’ll need to take a test shot to ensure that you’re getting that essential sparkle in the eyes. If not, adjust the position of your key light slightly until you do.
Subjects with pronounced brows, false eyelashes or hooded eyes might take a little more tweaking of light position than others. Asking them to tilt their chin upwards slightly will also help get the light into your subject’s eyes.
Advantages of clamshell lighting
The biggest advantage of clamshell lighting is that you don’t need a lot of studio strobes to create a professional looking image, and you can use it in a small space.
Leave a comment
If you have any questions about clamshell lighting for beauty photography, head shots or portraits, let us know in the comments.
Also, I love good news, so if my photography lighting tips have helped you, share that too.
Great article.. going to use your lighting ideas for a class on portraiture.
Hi Rob,
Thank you for helping me take better studio portraits. You explain the process in very clear and easy to follow recipes. I love that you encourage your readers to experiment when it comes to light people.
Take care,
Lou