There are so many ways to photograph groups of people and your approach depends on the type of group photo you’re taking. A corporate group photo for example is very different from family group photography.
Where you take group portraits also impacts on the decisions you make.
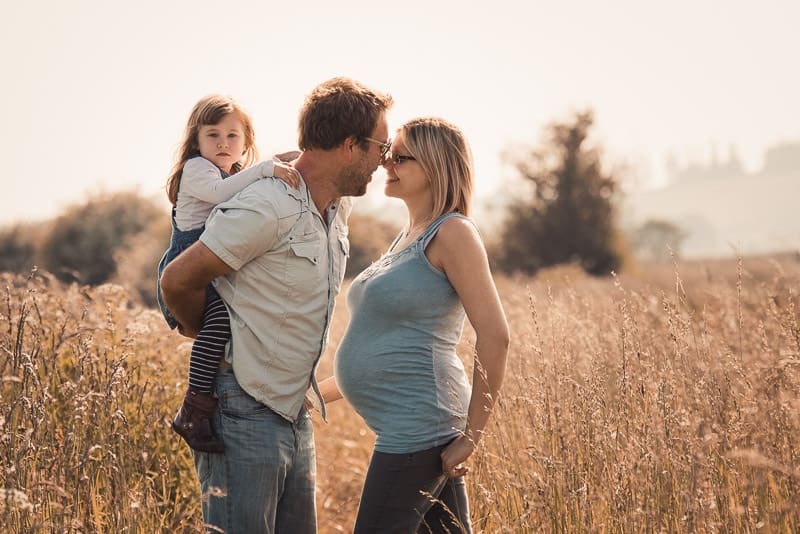
When you photograph families outdoors you have a lot more space to move in and it lends itself to a more relaxed, lifestyle approach. Whereas family portraits in the studio are generally more formally posed.
Here we’re looking at photographing family groups outdoors in a more relaxed style, but with the influence of posed portrait photography – it’s the best of both worlds!
We’ll start with camera settings for group photos and then move onto group photography posing.
How do you take a group photo with everyone in focus?
When photographers ask about focus for group photos, the answer involves more than just focus for a sharp photo. The other lens and camera settings that have a huge impact are:
- Aperture
- Focal length
- Shutter speed
But first, let’s look at where to focus in group photos.
Where should I focus in family photography?
In portrait photography when there’s one person in frame you should focus on the eye closest to camera. However, when you’re photographing a group of people it gets a little trickier to ensure the whole family is in focus.
With group photography you’re always juggling your options.
The further apart people are, the more difficult it will be to ensure that everyone is in focus. When I say further apart I mean from front to back. When everyone is standing in a line on the same focal plane, it’s easy, purely because they’re all on the same focal plane and will therefore be in focus wherever you focus.
But since when did a group of people (not in the forces) line up in a perfectly straight line? So, to be safe, focus on the person in the middle.
If a family is grouped close together in layers, your focus choice is also easy. Again, simply focus on the person in the middle of the group.
If the family is spread out, in layers, you need to decide who to focus on. But this can be a good thing and lead to interesting composition. More on that in a moment.

What F stop should I use for family portraits?
Ensuring that family group photos are sharp requires more than sharp focus. So you also need to consider what aperture to use.
How aperture creates a blurry background
In portrait photography blurring the background is a great way to separate the subject/s from the background.
With just one person in frame that’s easy, you can use a very wide aperture. Anything from F1.8 to F4 will do the job, depending on focal length and distance between photographer, subject and background.
However, with every additional person you add to the shot you make the juggle a little more difficult, because:
- you have to keep an eye on where everyone is
- the wrong aperture setting could result in blurry people in family portraits
So deciding on what F stop to use for family photos isn’t just about setting the exposure, it’s about controlling the depth of field and juggling the need to blur the background, but keep the family group sharp.
Depth of field settings for group photos
For group family portraits I’d recommend F4 as the widest aperture you should consider, especially with a zoom lens, but preferably F5.6 or F8 for large family groups.
Just bear in mind that if you set the aperture to F8 you must ensure that the family group is some distance from the background to ensure that it’s blurred. The further they are from the background, the more blurred the background will be.
A very important point on depth of field is that the area of “acceptable sharpness” is one third in front of where you focus and two thirds behind. Also, aperture is only part of the story.
The focal length you shoot at also affects the depth of field. So F4 at a focal length of 50mm results in a wider depth of field than F4 photographed at a focal length of 85mm.
With lifestyle group photography, because subjects have more freedom to move, it’s better to use a smaller aperture of F4 to ensure that they’re sharp. With more formal photography posing, where subjects aren’t moving around, you can open the aperture a little wider.
Setting exposure for group photos outdoors
Now that you have your depth of field figured out. You need to ensure that your photos are correctly exposed and this involves:
- Shutter speed
- Metering the scene

1. What is the best shutter speed for outdoor portraits?
Selecting the right shutter speed for outdoor portraits involves thinking through:
- Lens focal length
- Moving subjects
- Exposure for the amount of light available
Lens focal length and shutter speed
As a rule of thumb, you should ensure that your shutter speed is higher than the focal length you’re using. In other words, if you’re shooting at a focal length of 200mm, your shutter speed should be higher than 1/200.
At that focal length I prefer to have double the shutter speed, so set it to 1/400. This will cut out camera shake. The longer the focal length, the more chance there is of camera shake.
Subject movement and shutter speed
The next deciding factor on shutter speed is subject. With family group photos that include young children, it’s always a good idea to set your shutter speed above 1/250th to avoid subject movement blur.
Young children never stop moving and they buzz about quite quickly, so even 1/250th can be too slow.
If the family group is older and not moving, you can in theory photograph with a shutter speed as slow at 1/60th. For me, however, that would be too slow as my hands aren’t fantastically steady when holding a heavy camera and lens.
I never handhold below 1/80, even when shooting at a focal length of 50mm. Over time you’ll figure out your own limits.
Shutter speed for exposure
So, once you’ve taken all that into consideration, you also need to consider the amount of available light.
This might have a big impact on your choice of aperture and focal length. If you’re on a bright sunny beach, you can shoot at much faster shutter speeds than if you’re in a very leafy forest on a cloudy day.
2. What metering mode is best for portraits?
The most important part of a portrait is of course the face. Metering for a portrait of one person is no different when metering for group photography, even though there are of course more faces in a group photo.
The best metering mode is either spot metering or center-weighted metering and meter off your subject’s face. You might need to go in close and then move back to frame the scene. As you move further back and include more of the background, you’ll notice that the exposure indicator will move, but your exposure will be correct as long as:
- the light doesn’t change
- you don’t move away from the scene
- you’ve set the exposure for the faces
Just one thing to think about when metering exposure for portraits – different color skin meters differently with your camera’s light meter as it’s a reflect light meter. Lighter skin reflects more light than darker skin, as you can see in the article on using the zone system. So you might need to adjust for this with exposure compensation.

Continuous focus mode for family photography
When you photograph moving subjects it’s always a good idea to shoot in continuous mode and use back button focus.
This way you’ll always be ready to take the shot at the perfect moment, because your camera will always be focused on the action. In a more formal setting and without young children, single servo / one shot focus mode is fine, although I always have my camera set to continuous.
So that’s camera settings for group photography outdoors. Now let’s look at poses for group photography.
Composition techniques for posing groups
Photography composition is a very deep subject and it’s well worth it to learn as many techniques as possible so that you can apply them in all types of photography. It’s especially powerful to combine composition techniques.
Here are just a few composition rules that form the basis of group photography poses:
- Triangles in photography composition – group families in triangle shapes with the tallest point in the middle
- Perspective / viewpoint – photograph from different angles for variety – for example, looking down from above (more on this later), kneel and photograph from a lower height looking upwards
- Rule of odds – our eyes take in odd numbers better than even numbers, so with a family of four keep an eye out for odd number groupings.
Photographing families outdoors
For me photographing families outdoors is more of a lifestyle opportunity than a formal portrait photography session. In the studio I use more formal posing, but outdoors is perfect for incorporating movement into group photos, which little ones find so much more enjoyable.
Lifestyle photography is all about the connection and interactions between family members, so these posing techniques are more about arranging the group loosely in an unposed kind of pose.
Don’t get me wrong, there’s still a lot that should go into it, you just have to make it seem effortless.
Know your location
If you know your location and prepare beforehand, it’s one less thing to think about and you can then devote more of your energy to encouraging a fun vibe. You don’t need to know it inside out, but it helps to:
- Know where the sun will be at the time of your shoot
- Identify 3 backgrounds in close proximity for variety without taking everyone on an expedition
- Know the colors of the location so that you can make sure it works with what the group will be wearing
Knowing the area will also help you think through ideal poses before the shoot. For example, when photographing at the beach just after the tide has gone out, you won’t want group poses that involve lying on the ground in the wet sand.
Knowing the location also helps you to advise the family on what to wear for family photos.
Family posing basics
- Know the must get shots before hand and get those ones first. Once they’re in the bag, you can relax and capture the moments.
- Take charge (gently). People in front of a camera are vulnerable, so they’ll look to you to lead them. If you don’t, they become unsure of themselves and start making suggestions that might not work and it’s easy to spiral into chaos from there.
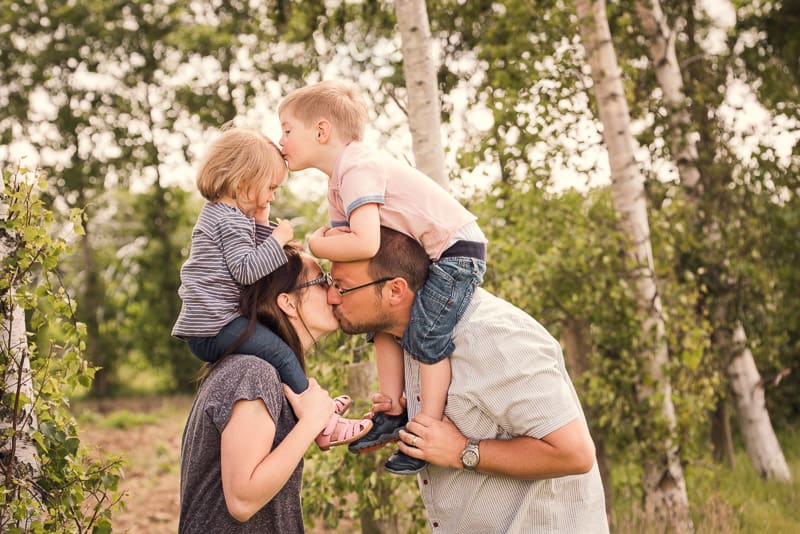
- They don’t have to look to camera – many families like to have photos of everyone looking to camera, but there’s so much more to being part of a family than just grinning at a camera, so make sure to capture the moments when they’re interacting with each other, like hugging, laughing, talking, playing
- Keep everyone close – you don’t have to smoosh everyone right up against each other (although a “squishy faces” shot gets everyone laughing), but they’re a family, not strangers, so you need to show that connection by getting them in nice and close together
- Keep it moving – time moves a lot more slowly when you’re being photographed than when you’re the photographer, so don’t get stuck trying to get a family pose exactly right. Set it up, get a few shots and move on. You can always come back to that particular pose again with a different background. You have twenty minutes before little ones get bored.
- Talk, laugh and have fun. Family photography is not a serious business, you need to keep your energy high to encourage them to have fun and enjoy the occasion – even if it’s your own family you’re photographing. You don’t need to constantly click away, slow the shoot down with casual conversation in between photographic moments. It helps everyone to relax.
- Children have their own rhythm. If you want a successful shoot, you can’t force anything. You need to fall into their rhythm and simply enjoy the process. If you get tense or the parents get tense, the children will pick up on it and nobody will have a good time. It really doesn’t matter if things don’t go exactly as planned – family photography is about creating memories not perfection, so make the memory of the shoot good.
- Keep in mind the triangle shape – have the tallest people in the middle (top of the triangle) and the shortest on the outside.
So, bearing that in mind, here are some posing fundamentals for photographing families outdoors in a light hearted and natural way.
Standing poses for family photography
When young children are in shot you have three options for standing poses:
- Have the parents hold them
- Photograph at the child’s height, holding parents’ hands, and crop the top half of the parents out
- Photograph the family from a distance

Sitting poses for family photography
Posing a family sitting on a blanket on the ground is a great way to even out different heights, especially with small children as they can stand or sit in a parent’s lap.
Everyone has different levels of flexibility for sitting on the ground, so check that everyone is comfortable. If not, it’ll show in the photo.

Lying down poses for family portraits
A great family pose is to have everyone lie in a circle on their backs with their heads together. You can then photograph them from above for an unusual viewpoint. Carefully move around the circle to capture them all at different angles.
Top tip – adults are more inclined to have double chins, so make sure that you position them horizontally opposite each other in the circle and photograph them angled to side to side, not bottom to top.
In other words if their head is in the middle their body should be going either left or right out of from, not towards the bottom of the frame.

Get everyone on their bellies, including you. A family group lying in a line on their stomachs, shoulder to shoulder is a different perspective.
Once you’ve got the shot it’s also a great way to introduce playtime with young children as they can be encouraged to climb on dad for a bit of fun and great candid moments.
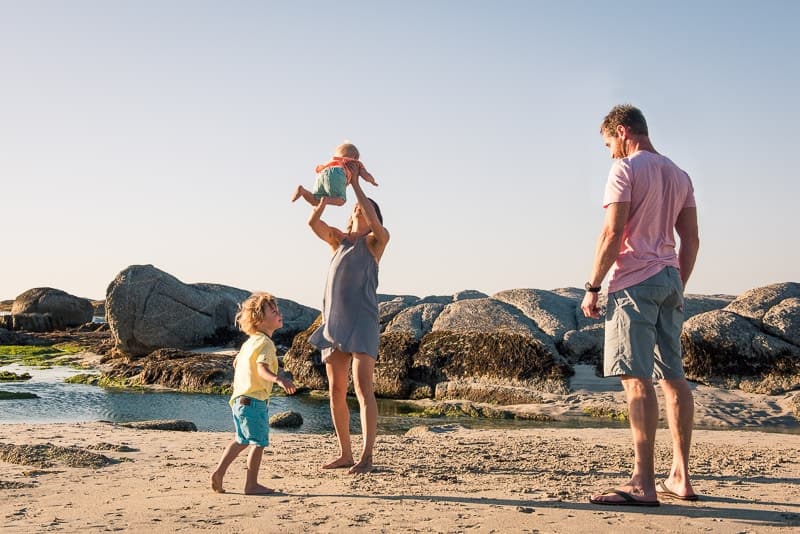
Moving poses for families
Family photography is much more relaxed when everyone is moving.
- Photograph them walking towards or away from you holding hands
- Or holding hands and walking from left to right of frame being led by a child in front
- Encourage young children to run towards you while the parents hang back, then focus on the children
Of course, when subjects are moving it’s more difficult to ensure that they’re in sharp focus. So if you struggle with this, check out my tutorial on focus tips for moving subjects.
How to pose large family groups
You don’t have to have everyone standing in a line, or in rows. It can work really well to break up a multi generation family into smaller family groupings within the same frame.
To do this you would of course need distance so that you can stand back and get everyone in frame.
Bear in mind too that children will get impatient, so you need to move fast and direct people with confidence. I’d suggest getting the adults in place first and then get them to bring little ones in. Then shoot fast.
Keep your energy up, keep it light and keep it fun.
How do you crop a family portrait?
In portrait photography there are rules for cropping people. Cropping in the wrong place is visually disturbing and unflattering. The rule of thumb is to ensure that you don’t crop through a joint. So crop above or below:
- Shoulders
- Elbows
- Wrists
- Hips
- Knees
- Ankles
It’s really important to remember fingers and toes too. Don’t chop off part of the hand or foot.
Of course, the more people you have in frame, the more difficult it gets to keep an eye on all limbs, but with practice it gets easier.
The alternative is to ensure that you photograph with a good amount of space around the family when they’re on the move. This is particularly essential with small children as they never stop moving.
Leave a comment
If you have any questions about photographing groups, let us know in the comments.
Also, I love good news, so if my group photography tips have helped you to understand how to photograph family groups outdoors, share that too.
The biggest problem with taking family photographs I have is the eyes as they often close as I take the picture or one person decides to look somewhere else. To get around the problem I set the shutter on a timer then they can see the camera blinking when its about to take the shot. On the whole the family does not like their picture taken. I have even tried setting the camera up in advance, do you have any tips to keep their attention and should they be looking at the camera?
Thanks for your questions, which I answered in Facebook live. I said I’d reply on here as well, so here you go…
The more people you have in a photo, the more chance there is that somebody will be blinking or looking off somewhere else when you take the shot – it’s really frustrating. So when it comes to group photos I find it helpful to take several shots. The worst case scenario is that you can then use different photos to create one group shot with everyone looking to camera by doing a head swap in Photoshop to ensure everyone.
Try photographing your family in a more relaxed style, rather than a formal group. It’s much less stressful for people who don’t want to be photographed. I don’t think a group of people should always look at the camera – it lacks emotion, which for me is the beauty of family photography. Rather capture their expressions and how they interact with each other.
My main tip is to be sure of your camera settings in advance so that you cut down on any wasted time, which will make it a more comfortable experience for them. Be chatty and keep it lighthearted.
I think some rules and location are very important before we jump into family photography, nice tips !! keep up the good work 🙂
Great article! Very useful tips. Thanks for posting.
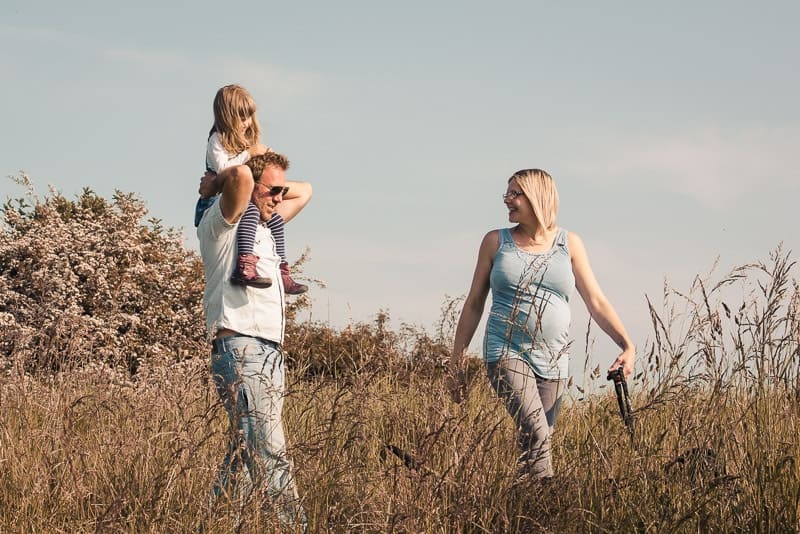
What type of lens would you use for family photos? For example, like your photos of the family of 3 in the field? I’m struggling between buying a 35mm or 85mm lens. Thanks!
Hi Faith
The photo you mention was taken at 170mm. My lens of choice for photographing families outdoors is my 70 – 200mm F2.8. I like the versatility of a zoom lens in a fast moving shoot, which is always the case when children are involved. The longer focal length also allows me to occasionally step back and photograph from a distance so that it feels less intimidating and intrusive. Aside from that, though, I like the depth of field that can be achieved with a longer focal length.
If had to decide between 35mm and 85mm I’d definitely go for the 85mm.
Hi Jane, thank you for this very useful article.. I’m actually a landscape photographer.. But I’m trying to get into portrait photography now as well.. I’ve done two family shoots to date.. And made a few mistakes but learned from them I hope.. Practice makes better so should go better for my next shoot a big family of 11.. 7 adults 3 kids and a 3 month old baby.. It’s booked for the 20th December.. So I have time to research and get my confidence up for the shoot..
Mistakes are definitely great teachers. Hope my portrait tips help you with your next session.