Have you heard of the sunny 16 rule?
If not, it may seem like a really odd name for a rule. Well, it’s not actually a rule, but more of a camera technique for outdoor photography.
The sunny 16 rule is a really logical technique for metering exposure without using your camera’s exposure meter or a light meter.
At the very least, it’s a great starting point for setting exposure on a sunny day.

What is the sunny 16 rule?
The sunny 16 rule states that if it’s a sunny day, there’s a very good chance that if you set your ISO to 100, your shutter speed to 1/100 and….here’s where the name on the tin comes from….your aperture to f16, you’ll have a correctly exposed image.
For this reason it’s also known as the sunny f16 rule.
What, that’s it? No.
But that’s not all
In addition to that, if you change your shutter speed to 1/200, change your ISO to 200 and keep your aperture at f16, you’ll have the same exposure. So, for the sunny 16 rule state to work just change shutter speed and ISO, equally and keep aperture the same.
Handy if you need a faster shutter speed.
In other words, your shutter speed should be the inverse of your ISO. If your shutter speed is 1/400, set ISO to 400 etc. Why would you do that? I’ll explain in a moment.
Obviously, there’s more to exposure than that. But the sunny 16 rule is a good guesstimate and an excellent starting point for setting exposure outside during the day. If you haven’t given manual mode a go yet, the Sunny 16 Rule is the easiest way to get started. You’ll need to understand the exposure triangle first.
But actually, you can take the sunny 16 rule even further than this! Read on.

What if it’s not sunny?
The sunny 16 rule is not just for sunny days. It works in the same way in not so sunny conditions, but with different aperture settings.
Set your ISO to 100 and your shutter speed to 1/100, then adjust just the aperture according to this rough guide for different lighting conditions outdoors:
- f22 – sunny and you’re in snow or on white sand
- f16 – sunny
- f11 – sunny and cloudy
- f8 – cloudy
- f5.6 – overcast
- f4 – sunset or in the shade
- f2.8 – dusk
Download and print my handy guide for aperture to use in different lighting conditions. Don’t forget though, that it’s just a starting point for setting exposure. Check your exposure indicator before taking the shot.
Reflection and direction of light
Both reflection and direction of light can get in the way of this rule being ridiculously easy. When you put them together, it really does throw your exposure off. This is why the sunny 16 rule is a rule of thumb and not an exact science.
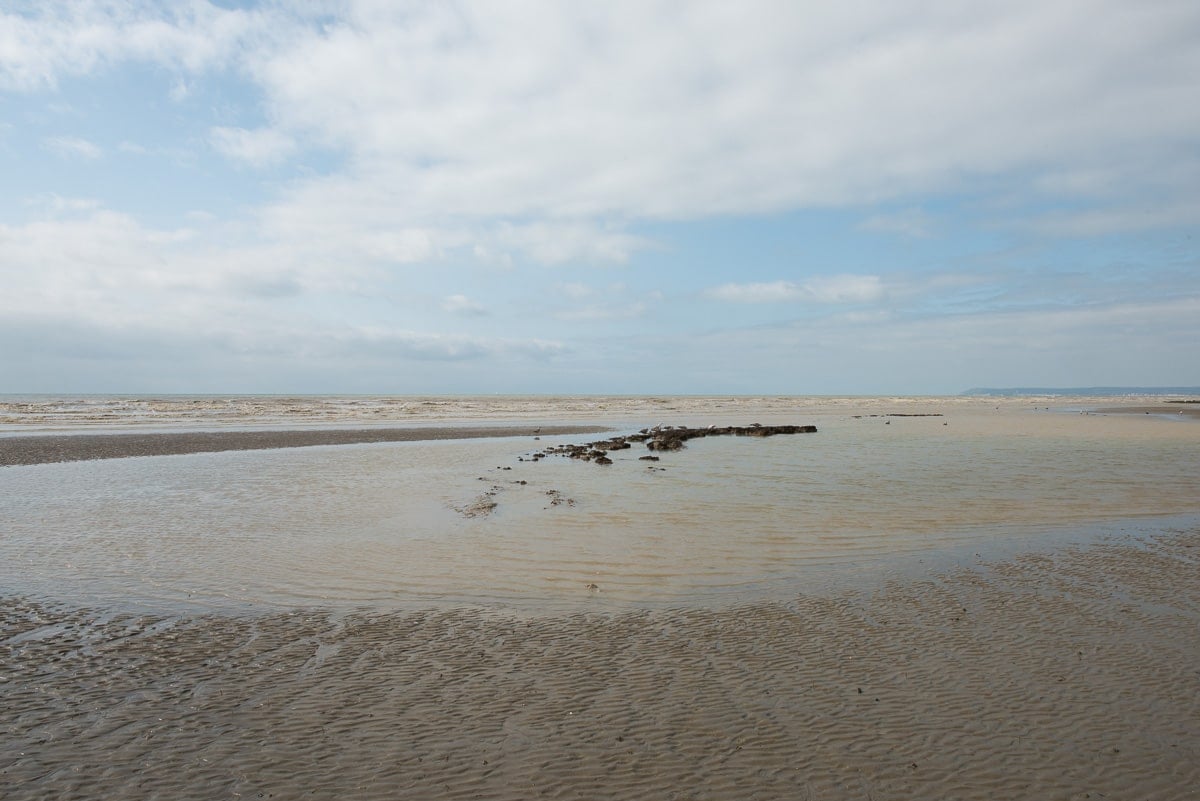
Water, for example, is a highly reflective surface, so if you’re shooting into the light on a wet beach (see below), the sunlight will bounce off the beach and into the camera, making for a very bright scene.
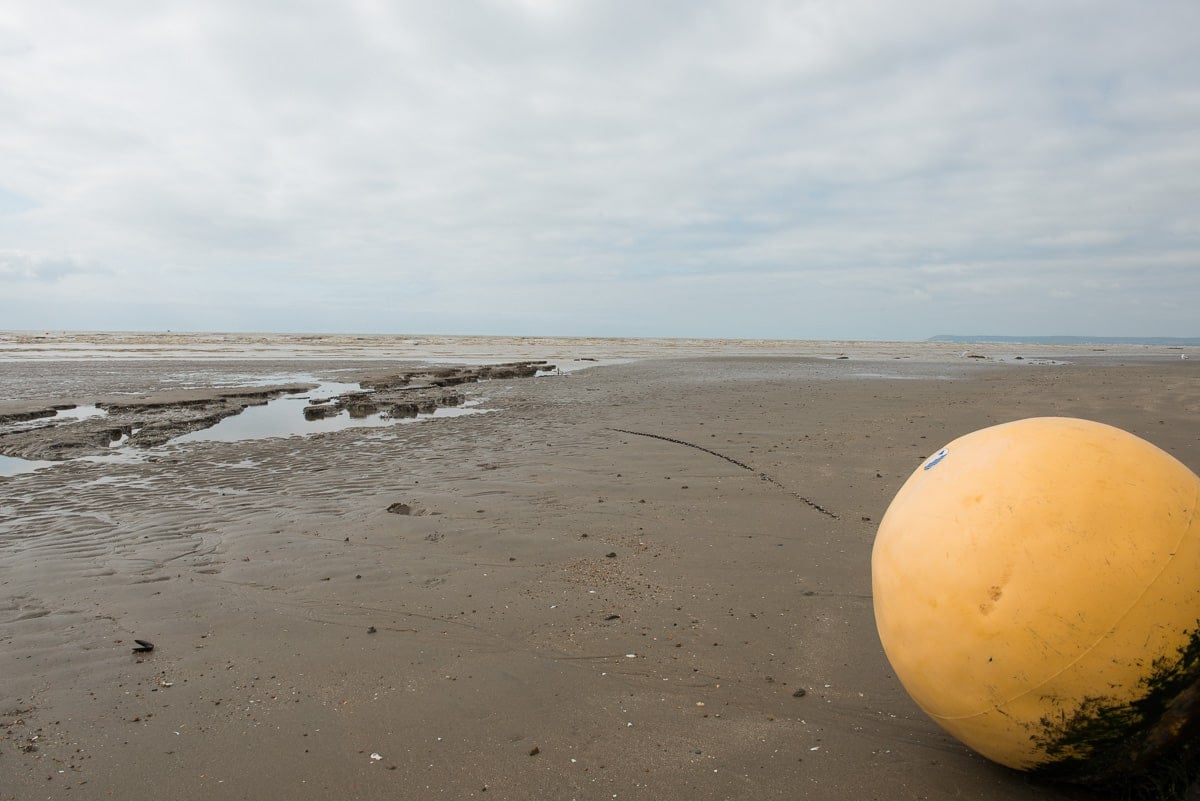
Turn the other way, so that the sun is behind you, and the light won’t be reflected back into your camera. It will, in theory, be a correctly exposed scene.

These photos were taken seconds apart with the same settings: ISO 100, shutter speed 1/100, aperture f16.
The only thing that changed was my direction. Photographing into the sun on a wet beach made the above image overexposed, while turning 180 degrees so that the sun was behind me correctly exposed the below image.
Advanced sunny 16 rule
Here’s where the sunny 16 rule gets really interesting, because those basic Sunny 16 camera settings of…
- ISO 100
- SS 1/100
- F16
…are simply the basis from which to set your exposure for outdoor photography.
Just because you’re outside on a sunny day doesn’t mean that you have to photograph at f16.
You might want to have a shallower or deeper depth of field than is achievable at f16. Alternatively, you might need a faster or slower shutter speed than 1/100.
So let’s look at using the sunny 16 rule and adjusting:
- Aperture
- Shutter speed
1. Aperture variations on the sunny 16 rule
For this you need to bear in mind how the exposure triangle works – if you adjust one of the exposure settings one way, you need to adjust one of the other two settings an equal amount the other way.
Shooting at f8 instead of f16 is a 2 stop increase in the size of the aperture (f16, f11, f8)…there’s 2 stops more light entering the lens.
So, to keep the exposure balance the same (with 2 stops less light) at f8, you need to either:
- Reduce your ISO by 2 stops to less than 100 or
- Speed up your shutter speed by 2 stops to 1/400
On my Nikon 2 stops lower than ISO 100 is L10. There’s only so far you can reduce the ISO, so in most situations I’d change shutter speed.
2. Shutter speed variations on the sunny 16 rule
If shutter speed is your priority and you want to photograph slower than 1/100 to maybe blur water for example…
In this situation, to maintain the same exposure value…
- If you slowed your shutter speed down to 1/50 (1 stop more light)
- You’d need to adjust your aperture the other way from f16 to f22 (1 stop less light)
An example – how I apply the sunny 16 rule
I prefer not to photograph below 1/200 when handholding my camera and quite often I like to use an aperture of f4. So, for my preferences on a sunny day, I use the sunny 16 rule like this:
- Aperture – f4 (4 stops wider than f16)
- Shutter speed – 1/1600 (4 stops faster than 1/100)
- ISO – 100
That’s the theory bit over.
Let’s see the sunny 16 rule at work…
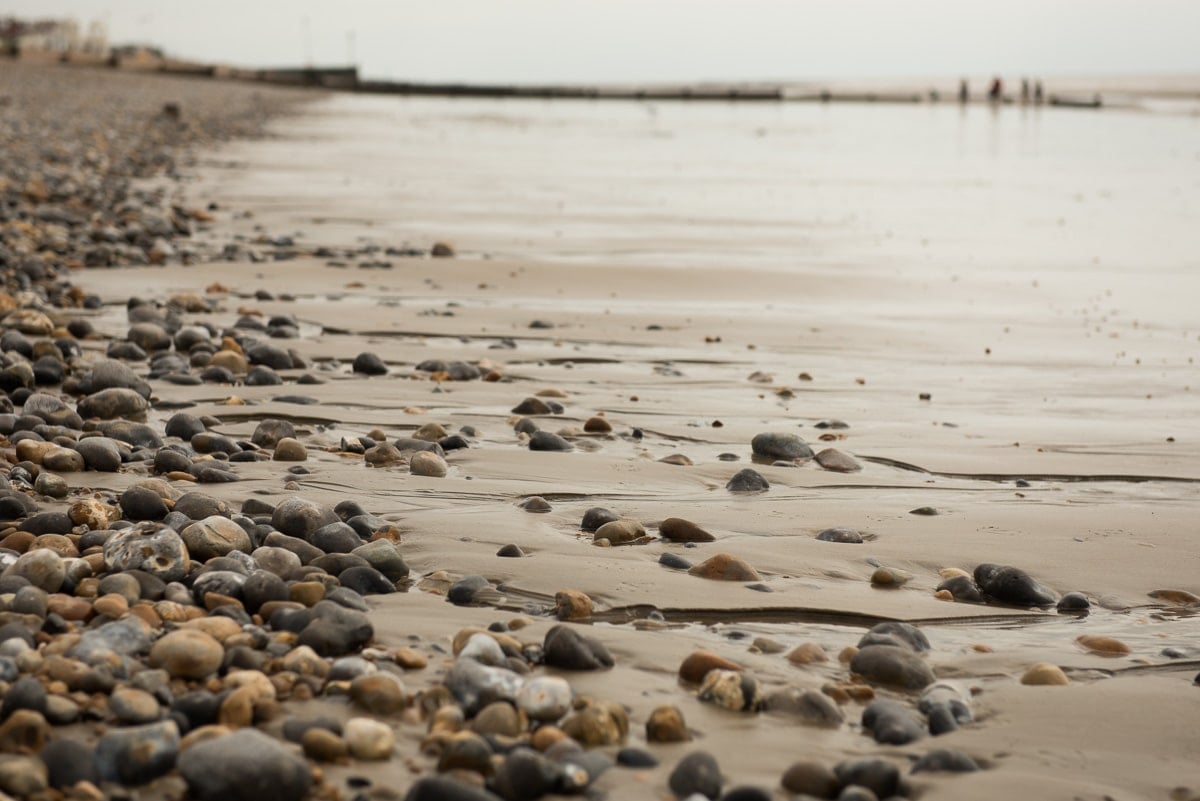
Although it was a sunny/cloudy day, it was very bright with a lot of reflection, so I used an aperture setting of f16 as the starting point instead of f11 (which is usually more suited to a sunny cloudy day).
Camera settings for image above: ISO 100, shutter speed 1/100, aperture f16. Below settings: ISO 100, shutter speed 1/400, aperture f8
For the image below, I changed the camera settings. The shutter speed went up 2 stops from 1/100 to 1/400, so I opened up the aperture by 2 stops from f11 to f8 to achieve the same exposure for both images.

Here’s another example below. This time showing how I prefer to apply the sunny 16 rule by adapting my camera settings.

Camera settings for above image: ISO 100, shutter speed 1/100, aperture f16.
Image below camera settings: ISO 100, shutter speed 1/1600, aperture f4.
I wanted to blur the background, so I set my aperture to f4. This meant that I had to adjust my shutter speed by 4 stops as well, the equivalent amount the other way.
As you can see, once you understand how to use the sunny 16 rule, you can adjust it to fit how you want to capture a scene without having to use a light meter.
Although, as I said before, it always helps to double check it against your camera’s light meter. Unless you’re in tricky lighting conditions that can fool your cameras exposure meter.
If you like photographing on sunny days, here are 7 tips for great photos in bright sunlight.
Leave us a comment
If you have any questions about exposure and the sunny 16 rule, let us know in the comments.
Also, I love good news, so if my outdoor photography exposure tips have helped you to understand how to use the sunny 16 rule, share that too.
Good explanation. Made the relationship between elements of the triangle much clearer.
Fantastic tutorial!! Thank you for sharing.
If you alter one component of the triangle by 2 stops, can you split the counterbalancing adjustments by making a 1 stop change to each of the other two components instead of changing only one component the full 2 stops?
I’m thinking of a scenario where you wander out without a tripod on a cloudy or overcast day and stumble upon a gorgeous landscape. Let’s say you had already altered the 1/100, ISO 100 to 1/200, ISO 200 to accommodate shooting handheld. But, to get the depth of field you want on this gloomy day, you need to narrow your aperture by 2 stops. Slowing your shutter speed 2 stops from 1/200 to 1/50 will make for some serious camera shake, but you think you could do okay at 1/100. But that’s only providing 1 stop more light to counterbalance the change in aperture. Could the other stop come from increasing the ISO 1 stop as well (from ISO 200 to ISO 400)?
I know this is kind of a dense question in terms of details.
I’m essentially curious if you can distribute counter adjustments between the other two elements (and, if so, if it has to be 50/50 [1 stop change to shutter speed + 1 stop change to ISO = counter adjustment to 2 stops change to aperture] or could you split it using thirds [2/3 stop change in shutter speed + 1/3 stop change in ISO = counterbalance to 1 stop change to aperture). Or does the other adjustment have to be made entirely and exclusively to only ONE of the other two elements of the exposure triangle.
Hi Eleanor
Yes, you’re absolutely right! Exposure is all about juggling the three settings in the same way that 3+3+3=9 and 7+1+1=9 and 5+3+1=9 etc etc.
It’s also what makes the sunny 16 rule such a useful place to start with exposure settings when photographing outdoors with natural light. For example, I tend to use f4 a lot and never f16. So, on a sunny day, instead of f16, shutter speed 100 and ISO 100 I’d set my camera to f4, shutter speed 800 and ISO 100.