The exposure triangle and ISO
ISO is one of the three members of the exposure triangle gang, along with aperture and shutter speed. To get a beautifully exposed photograph you need to know about the exposure triangle and what is ISO.
It’s as important as being able to focus. Once you’ve mastered exposure and focus, you can start thinking about composition and getting creative with light.
The crazy thing is that once you understand exposure, it just seems so obvious, but wrapping your head around it can be a challenge.
Don’t worry, you’re not alone. Anyone who has ever mastered photography has gone through what you’re going through.
You will get this.

What is the exposure triangle?
So, to start with, what exactly is this exposure triangle that you keep hearing about? The exposure triangle is a concept that helps new photographers understand the factors involved in exposure. It’s a combination of three settings:
- ISO
- shutter speed
- and aperture (f-stop)
We cover each of these elements separately in different tutorials, because they’re that important.
To really get to grips with the exposure triangle, read The exposure triangle – why is it so important? Here we break it down and then piece the triangle back together.
Further reading:
The Exposure Triangle – what role does aperture play?
Shutter speed and the exposure triangle – what does shutter speed do?
How ISO fits into the exposure triangle

What is ISO?
ISO is a carry over from the days of film where the ISO (light sensitivity of the film) was indicated in terms of 50, 100, 200, 400 etc. In the US it was referred to as ASA.
Photographers used to have to decide on ISO when they decided what roll of film to put in the camera, and then shoot the next 24 or 36 shots at that ISO – i.e. until the roll of film was finished.
Now, with digital cameras, we can change ISO for every shot if we want.
I think the ability to change ISO so easily is what has added to the confusion. Too much choice can make a decision difficult. I take forever to make up my mind when we go to a restaurant that offers a large and varied menu.
What happens when you adjust ISO?
In a digital camera the sensor has replaced film as the element that captures light and converts it to an image. So, when you adjust the ISO you’re adjusting the sensitivity of the sensor to the light. A higher ISO of say 400 will be more sensitive to light than an ISO of 200.
What does that mean?
If you have a car with headlights that come on automatically, you’ll have noticed that sometimes the headlights come on when it doesn’t seem necessary. The sensor has picked up that the light is below a certain level. If you’re in the UK, where winter is grey and dark, you’ll definitely have experienced this.
Your eyes can adapt to low light conditions to see better, but sensors can’t.
Even though you can see just as well indoors as you can outdoors, your camera can’t without changing settings. In auto mode, your camera will automatically adjust. In manual mode you must make the adjustment to enable your camera to capture more light.
One method is to “bump up” your ISO, in other words, increase ISO sensitivity.
My eyes are really light sensitive, so I always wear sunglasses when out and about. Dropping down the ISO is like putting a pair of sunglasses on your camera.

This was taken after sunset with natural light. I set a high(ish) ISO of 800, because of the low light conditions.
In a normal home, with the normal number and size of windows, with curtains open, a good starting point is an ISO of 400. Outside, on a normal sunny day, a good starting point is 100 or 200.
I say starting point, because nothing about light is definite. Every day is different and the light strength differs at different times of the day.
So an ISO of 400 might work now, but an hour from now something might have changed. There might be a few clouds in the sky. There’ll be less light and, if you want to keep aperture and shutter speed the same, you might need to change your ISO to 640 or more.
Why not just set ISO to auto?
Good question!
It seems to make sense that, if the camera needs to adjust to “see” better, then why not leave it to the camera to decide on what it needs and set your ISO to auto?
I’ll answer with a question. What if you’re taking a photograph of your child in a patch of sunlight on the sofa, and you want to capture the moment with deep shadows or bright highlights?
Like all auto settings, in auto ISO, the camera will want to average the exposure. In other words it’ll want to capture detail in the shadows, so won’t want them to be too dark. It won’t want to blow out highlights either, but would rather retain details.
You won’t have full control of the exposure when using auto ISO.
The most important skills you can learn as a photographer is the ability to:
- See the light
- Judge the quality of the light
- Decide how you want to capture a scene
Photography is all about light. Using shadows creatively is part of knowing how to use light.
Paying attention to the exposure triangle and making decisions about ISO, aperture and shutter speed will train you to judge the light.
However, with all that said, there is a time and place for using Auto ISO.
Further reading: Auto ISO – pros, cons and how to use it
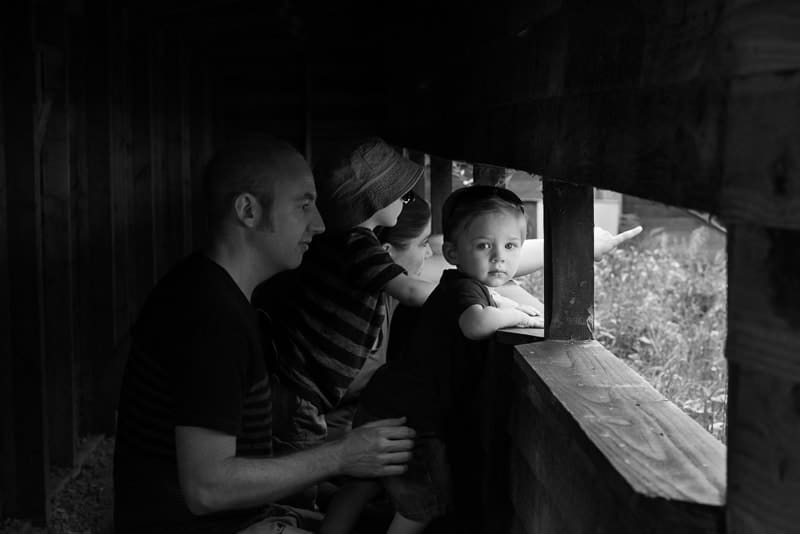
This moment in a bird hide could not have been captured so effectively in auto. The youngest child is the focal point of the image, so ensuring that he’s perfectly exposed draws the eye directly to him. The rest of the family is in shadow as they are not as close to the light.
What is noise in photography?
So, why not just set your ISO to 1200 and never worry about it again? Why all the faffing about with different ISO’s?
Well, that would be easy. But – you knew there would be a but – there’s a trade off with higher ISO settings. The trade off is noise.
If you’ve never heard of “noise” being associated with a photo, here’s a quick explanation…
In film photography we talk about an image being grainy. In other words, it’s kind of rough looking. No smooth, deep blacks or crisp, clean whites. There’s a muddiness to the image.
In digital photography that’s called noise.
There’s nothing wrong with noise, if that’s what you want. In fact, it’s a great creative element to use. It’s when you don’t want it that it’s a problem.
Two factors that affect noise:
- Higher end cameras are capable of much higher ISO settings in low light than entry level cameras without noise affecting the image
- When you try to fix an underexposed image in post production there’s a good chance noise will be introduced to the image, no matter how low your ISO was. The amount of noise depends on how underexposed the image was. (More on this further down.)
Further reading: How to avoid and reduce image noise in photography
Photography is all about control. Before you take the shot you decide what you want. Then you set your camera and go for it. Again, this all comes down to the exposure triangle.
You see how important that triangle concept is?
Setting ISO to add or avoid noise
Maybe your subject matter is gritty and edgy and you want to noise to add to the mood. On the other hand, maybe you want your image to be as sleek as possible, so you want absolutely no noise.
In order to achieve the result you want, you need to control your ISO.
High ISO = more noise
Low ISO = less noise
It works exactly the same way as your sound system – turn it up for more noise.
Let’s say you’re:
- taking a photo indoors
- using natural light
- of a sleeping baby
This isn’t a subject matter than commands grit or edginess. It’s a baby – beautiful and new – so we want a sleek, smooth image with a good amount of light.
We want a low ISO.
But, here’s the catch. You’re indoors, which means there’s less light available.
- Setting a low ISO means the camera’s sensor will be less sensitive to the available light
- But a high ISO could introduce noise (depending on your camera), which you don’t want
What are you going to do?

Let’s sidetrack for a moment
At The Lens Lounge we do not encourage you to spend on camera gear in the hopes of becoming a better photographer. We say work with what you’ve got, master what you’ve got. If you then find that your equipment is limiting you, upgrade. Only then.
You’ll learn so much more by working within the parameters of your equipment.
So, bearing in mind that you shouldn’t upgrade your equipment until it’s absolutely necessary…
One of the reasons why the top of the range cameras cost so much is because of their sensors. The technology in these cameras is quite staggering. They’re complex and optimised to handle low light situations far better than cameras lower down in the range.
What this means is that the camera you use will have an impact on your decision.
The ISO I can shoot at noise free on my Nikon D810 is much higher than on my D700, which again is higher than on my D300.
Exposure triangle and ISO decisions
Your decision comes back to the exposure triangle: ISO, aperture and shutter speed. I’ll move through this quickly so that we don’t get too sidetracked, but to fully understand the process, read our tutorial on the exposure triangle.
In our example scene we’re lucky:
- The baby is sleeping
- So is not active and moving.
- We can go with a slow shutter speed – the shutter is open for longer, so more light comes in
- Shooting wide at F4 (or wider) is great with babies. So, again we’re lucky. Our aperture can be wide to take in loads of available light
So far so good.
But where in the room is the baby? Is it near a window, or on the opposite side of the room from the window?
The further you are from a window, the darker the room becomes, because there’s less available light.
Further reading: What are stops in photography exposure?
ISO decision
Let’s say the baby is near the wall opposite the window. This isn’t ideal, but for the sake of this exercise let’s say we don’t want to wake the baby by moving it, so we have no choice.
We have to bump up our ISO or the photo will be underexposed. Remember, we’ve already set our aperture and shutter speed to what we want/need for the available light, so the only thing left to adjust is the ISO.
Now you say, well that’s okay, I’ll leave the ISO low, because I’ll just brighten the photo afterwards on the computer. Here’s the catch with that…
Why brightening an image on the computer is not ideal
When you underexpose a photo and then adjust it in Lightroom or Photoshop, or whatever software you use, you’ll lose image quality.
The more you have to use your software’s exposure tool to brighten an image, the more the quality will be affected. I’m not talking about minor adjustments. I mean when you look at a photo and it’s just so dark that you really have to brighten it.
In this instance noise from using a high ISO is far less than noise that’s introduced when brightening an underexposed image in post.
When you’re taking the shot you have the opportunity to get it right, so why not just do that? I’m a huge fan of actually taking photographs, rather than spending hours on the computer.
Luckily babies are easy to move, and this one is fast asleep in a basket, so we’re going to move baby closer to the light, set our ISO low and capture gorgeous, noise-free images.

Camera settings: aperture – f4, shutter speed – 1/200, ISO – 200
Leave a comment
If you’re struggling to understand what is ISO and how to use it, you can be sure that many others are struggling too. Share your experiences, your questions about the exposure triangle and ISO below and we’ll give you some help.
Share your successes and I’ll give you a high five for persevering!
If this tutorial has helped you to understand what ISO is for, share that too – I love good news!
I am really happy To became your reader . I have more understanding now I will be looking forward to get more information